Introduction
Creating a bot with the Microsoft Bot Framework is a great deal of work, requiring good C# skills as well as language skills. There is a much easier way that creates an instant conversational Bot within the Bot framework and Azure Bot Service, that you can then modify for your needs. You still use the bot framework, so you can connect the bot to skype, Facebook nessenger, a webchat control, telegram slack, etc, just by configuring your bot in Azure.
Background
Bots actually have a long history going back to the 60s. I remember writing one in 1984 on A VAX system that emulated a particularly annoying co-worker! The general principle is to recognise sequences of text and to have pre configured answers. In addition, you may want to capture data values for re-use and to vary the responses randomly, or based on previously captured data. That gives a fairly convincing Bot - Most of the Turing prize participants have used this system. To be really useful though, the bot ought to be able to interact with external services and it ought to be able to move into much more complicated interactions, to offer advice or provide a service. The DARL Bot system offers just such a service. You can create a conversational Bot that can trigger expert system type fuzzy logic rules that perform some more complicated processes. There are examples on the site of personality tests, tax calculations and RobotLaw applications like disputing a parking ticket, claiming for flight delays or creating a compliance document. Bots can also access external services - sending emails, SMS messages, etc.
Creating Your First Bot
You will need a Microsoft™ Azure account which you can get here.
To begin, go to the Microsoft Azure Portal and log in to your account.
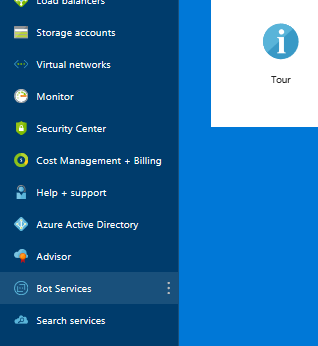
Select Bot services.

Select Add and then Bot Channels Registration.

Select Create.
Fill in the name of the new bot, which must be as yet unregistered, and fill in the other values.

Either set the appid and password yourself, or auto create.
Select Create again.
After a short period, your Bot connection will be created.
Select the bot you have just created, go to settings and then above the App ID, click on manage.
At this point, you need to get an account with the DARL bot service. Just go to https://darl.ai/account/freetrial.
Note that you need a Microsoft Account.
Now, in Darl.ai, select the model you wish to use for the bot on the models page.
Select Open model and then choose Connectivity on the left side bar.

Click the +row button and fill in the App ID and the password from the portal settings. You may need to create a new pasword.
Now click Save connectivity at the bottom of the page.
Back on the Portal Settings page in Azure, set the messaging endpoint to “https://darlbot.com/api/messages“.

Save the changes to the bot in the portal.
Now, if everything has worked, you should be able to test the new bot using the Test in web chat link.

You can make changes to the selected bot using the Edit tree page.
You can switch the bot model used by deleting the appropriate row in the Connectivity Bot Framework’s connection, (making note of the App ID and password) opening the preferred model on the models page, going back to connectivity, now for the new model, and adding the removed credentials to that bot model.
That's it. Once you have a working bot you can connect it to Skype, Facebook Messenger, etc. by creating accounts with each portal and setting those in the Azure Bot Service.
History
- 04/14/2018: Initial version
