Introduction
This article discusses the issue of creating tabs using ASP.NET controls (View and
Multiview). The layout we will discuss contains
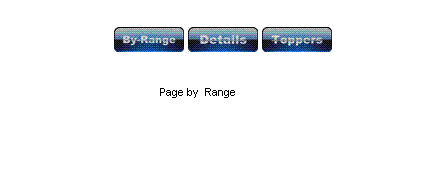
three Buttons that are linked to a Multiview container that contains
three Views as child controls. We will see how we can customize the simplicity
of View and Multiview controls to create flexible and good looking tabs. This is
not a fully functional tab, but just a blue print of the concept,
you can customize it according to your own needs.
Using the code
The article is written using ASP.NET with C#. The .Aspx page is given blow. Here we have to create
three image button controls. After that we create a container in the form
of a Multiview server control, inside which we create three nested
View controls which we name view1, view2,
view3, respectively.
<table border="0" cellpadding="2" cellspacing="3" width="100%">
<tr>
<td align="center">
<asp:ImageButton ID="ImageButton1" runat="server" Width="70px"
   Height="25px" onclick="ImageButton1_Click" ImageUrl="~/View_images/By-Range_n.Png" />

<asp:ImageButton ID="ImageButton2" runat="server" Width="70px"
   Height="25px" onclick="ImageButton2_Click" ImageUrl="~/View_images/Details_n.Png" />

<asp:ImageButton ID="ImageButton3" runat="server" Width="70px"
   Height="25px" onclick="ImageButton3_Click" ImageUrl="~/View_images/Toppers_n.Png"  />
</td></tr>
<tr><td colspan="3"><asp:MultiView ID="MultiView1" runat="server">
<table width="100%" cellpadding="2" cellspacing="5">
<tr><td>
<asp:View ID="View1" runat="server">
By range view page.
</asp:View>
</td>
<td>
<asp:View ID="View2" runat="server"><br />
Detail view page
</asp:View>
</td>
<td>
<asp:View ID="View3" runat="server">
Toppers view page
</asp:View></td></tr></table>
</td></tr></table>
</xmp>
The code for the code behind file is given below.
protected void Page_Load(object sender, EventArgs e)
{
if (!IsPostBack)
{
SetDefaultView();
}
set();
}
protected void set()
{
ImageButton1.ImageUrl = "View_images/By-Range_n.Png";
ImageButton2.ImageUrl = "View_images/Details_n.Png";
ImageButton3.ImageUrl = "View_images/Toppers_n.Png";
}
private void SetDefaultView()
{
MultiView1.ActiveViewIndex = 0;
}
protected void ImageButton1_Click(object sender, ImageClickEventArgs e)
{
MultiView1.ActiveViewIndex = 0;
ImageButton1.ImageUrl = "View_images/By-Range_p.Png";
GridView1.Visible = false;
}
protected void ImageButton2_Click(object sender, ImageClickEventArgs e)
{
MultiView1.ActiveViewIndex = 1;
ImageButton2.ImageUrl = "View_images/Details_p.Png";
}
protected void ImageButton3_Click(object sender, ImageClickEventArgs e)
{
MultiView1.ActiveViewIndex = 2;
ImageButton3.ImageUrl = "View_images/Toppers_p.Png";
}
Points of Interest
You can see how simple it is to link a button server control to a Multiview container, which gives a look of multiple pages. With this we do not need
to post our page to the server for processing, which increases the page response time.
