SharePoint
2010 – Creating Host Name for Web Application
In this
article we can explore how to quickly setup a Host Name for the SharePoint Web
Application.
Why we
need Host Names?
I hope some
of you might be having a question in mind why we need a host name. I will try
to explain the purpose.
You have the
following website for a user:
You said
that each of the represents the following:
- Financial
Site
- HR
Site
- Research
Site
The problem
is difficulty in using those urls as there is no meaning associated with it. A
better solution would be:
So this neat
and clean approach requires configuring Host Headers for the SharePoint web
applications. The host header configured will get passed in the HTTP header
message. The host header has to be published inside a DNS server to get it
resolved to IP and port.
The
approach used here can be used across Windows 7 and Windows 2008 machines. Please
note that you can even configure host names with site collections too.
Our Aim
We are
trying to create a web application with the following name:
http:
Following
are the steps involved:
Step 1: Create the Host Name
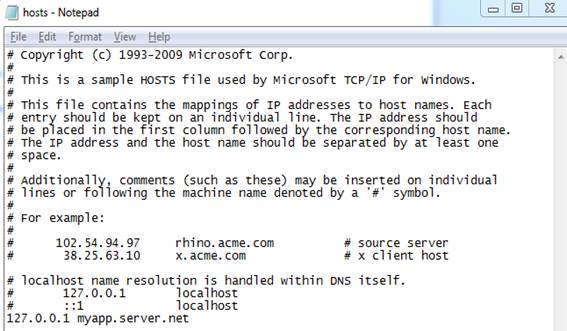
Open the
hosts file from the following location:
C:\Windows\System32\drivers\etc
Enter the
following line into it and save the file:
127.0.0.1 myapp.server.net
Now the file
content looks like:
Step 2: Create Web Application
Open the
SharePoint Central Administration and create a new web application.

Please note
to set the following properties:
            Port: 80

            Host Header: myapp.server.net
The
properties are highlighted below:
After
entering all the details click the Save button. Wait for the operation to be
completed and you can try entering the url in the browser.
http://myapp.server.net
Step 3: Disable Loopback
If you get a
prompt for the user and you may face the following issues:
- There is continuous
prompt for the credentials
- HTTP 401.1 error
This shows
that there is a problem with the Loopback configuration. This case should
occur only when we access the application from the server machine.
For fixing
the problem we have to disable Loopback value inside registry.
Open
Registry Editor (regedit.exe) and locate the following key:
HKEY_LOCAL_MACHINE\SYSTEM\CurrentControlSet\Control\Lsa
Create a new
Key Value of type DWORD inside it and set the value to 1
Step 4: Test the Host Name
Now you can
try entering the host name in the browser and you should be able to access the
site after entering credentials.
If you can
see the site as shown above then you are done with the Host Header
configuration.
References
Summary
In this
article we have explored how to quickly setup a Host Name for the SharePoint
Web Application. In real world scenarios the SharePoint Administrator need to
work with the Network Administrators to configure these entries.

