SharePoint
2010 – Create Site Column Example
In this
article we can explore the creation of Site Columns inside SharePoint user
interface.
What are
Site Columns?
Site Columns
provides a central, reusable column definition. A site column can be used
across sub sites or lists inside the site collection.
Creating
a Lookup Site Column
In this
example we are creating a new Site Column of type Lookup. The site column is
needed to capture the supported state for courier services.
Currently
the following countries are supported:
- New Jersey
- New York
- Virginia
- Arkansas
- California
- Texas
As time goes
by more and more states are supported by the courier company. The site column
provides the advantage of making the change in only one place and all the
associated lists are reflected with the change.
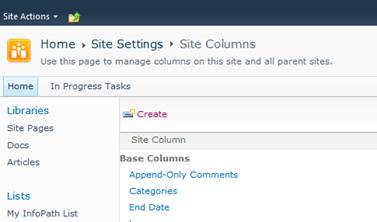
Step 1: Create a site column
Open the
SharePoint site and select Site Actions > Site Settings > Site Columns.
In the appearing page use the Create button to create a new site column.
Step 2: Enter the Column Details
Enter the
column details as shown below:

Click the OK
button to save the changes.
Step 3: Create a new sub site
Create a new
sub site using Site Actions > New Site. After creating the site, create a
new List inside it deriving from Custom List.
After
creating the list go to the List Settings screen and select the Add from
existing columns option in the Columns section.
Step 4: Add the new site column
In the
appearing dialog select the Service State which should be listed.
Click the
Add button to add the column into list. Click the OK button to save the
changes. Going back to the list you can try adding a new item.
The Site
Column is ready with the values in the add dialog as shown below:
Step 5: Testing the new site column
This
concludes our creation of Site Column and using it across another sub site
list.
Step 6: Adding New Value
Imagine that
there are around a dozen of lists using the above site column. Now the courier
service added support to the state Colorado. In this case do not need to
change all the lists. Instead modify only the Site Column.
Go to Main
Site > Site Actions > Site Settings > Site Columns and select our Site
Column for editing. Add the new value Colorado and save the changes.
Back to the
list try adding a new item and you should be able to see the new value there.
References
Summary
In this
article we have explored the creation of site columns using SharePoint 2010 and
the convenience of changing it. In real world scenarios
Site Columns are good aid to maintain the consistency across sites.

