Introduction
In this article, I would like to show you how to create a Windows batch file to take backups from
a PostgreSQL database.
Background
When I was working with a PostgreSQL database for one of my projects, I needed an auto system for taking backups daily.
After some research, I came up with this idea to create a Windows batch file and put it under
the Windows Scheduler.
To prepare for a chart, use these steps given below.
How to Configure
Step 1
Download the batch file.
Step 2
You can start the Task Scheduler MMC snap-in by using a single command from the command line or by using the Windows interface. Task Scheduler can also be started
by double-clicking the Taskschd.msc file in the %SYSTEMROOT%\System32 folder.
To run Task Scheduler using the Windows Interface
Click the Start button. Click Control Panel. Click System and Maintenance. Click Administrative Tools. Double-click Task Scheduler.
To run Task Scheduler from the Command Line
Open a command prompt. To open a command prompt, click Start, click All Programs, click Accessories, and then click Command Prompt.
At the command prompt, type Taskschd.msc. The Schtasks.exe command line tool enables a user to complete many of the same operations
that they can complete using the Task Scheduler MMC snap-in. This tool enables a user to create, delete, query, change, run, and end scheduled
tasks on a local or remote computer. This tool is located in the %SYSTEMROOT%\System32 folder. Type Schtasks.exe /? from a command prompt window to view the help for the tool.
Step 3
You can schedule a task by either creating a basic task using the Create Basic Task Wizard or by creating a task without the wizard and supplying
task information in the Create Task dialog box. The procedures below describe how to create a task using either method. If you create a basic task using
the Create Basic Task Wizard, most of the task properties will be set to their default values, and you choose a trigger for the task from the most commonly
used triggers. For more information about triggers, see Triggers.
You can import a task that is defined in an XML file. For more information, see Import a Task.
For information on creating a task on a remote computer, see Manage or Create a Task on a Remote Computer.
To Create a Basic Task by Using the Windows Interface
If Task Scheduler is not open, start Task Scheduler. For more information, see Start Task Scheduler.
Find and click the task folder in the console tree that you want to create the task in. For more information about how to create the task in a new task folder, see Create a New Task Folder.
In the Actions Pane, click Create Basic Task. Follow the instructions in the Create Basic Task Wizard.
To Create a Task by Using the Windows Interface
If Task Scheduler is not open, start Task Scheduler. For more information, see Start Task Scheduler.
Find and click the task folder in the console tree that you want to create the task in. If you want to create the task in a new task folder,
see Create a New Task Folder to create the folder. In the Actions Pane, click Create Task.
On the General tab of the Create Task dialog box, enter a name for the task. Fill in or change any of the other properties on the General tab.
For more information about these properties, see General Task Properties.
On the Triggers tab of the Create Task dialog box, click the New… button to create a trigger for the task, and supply information about
the trigger in the New Trigger dialog box. For more information about triggers, see Triggers.
On the Actions tab of the Create Task dialog box, click the New… button to create an action for the task, and supply information about the action
in the New Action dialog box. For more information about actions, see Actions.
(Optional) On the Conditions tab of the Create Task dialog box, supply conditions for the task. For more information about the conditions, see Task Conditions.
(Optional) On the Settings tab of the Create Task dialog box, change the settings for the task. For more information about the settings, see Task Settings.
Click the OK button on the Create Task dialog box.
To Task by Using a Command Line
Open a command prompt. To open a command prompt, click Start, click All Programs, click Accessories, and then click Command Prompt.
Type:
schtasks /Create [/S <system> [/U <username> [/P [<password>]]]]
    [/RU <username> [/RP <password>]] /SC <schedule> [/MO <modifier>] [/D <day>]
    [/M <months>] [/I <idletime>] /TN <taskname> /TR <taskrun> [/ST <starttime>]
    [/RI <interval>] [ {/ET <endtime> | /DU <duration>} [/K] [/XML <xmlfile>] [/V1]]
    [/SD <startdate>] [/ED <enddate>] [/IT] [/Z] [/F]
To view the help for this command, type:
schtasks /Create /?
Additional Considerations
If the Remote Scheduled Tasks Management exception is disabled and the File and Printer Sharing exception is enabled in the Windows Firewall
settings,
and the Remote Registry service is running, a V1 task will be created on the remote computer even when the V1 parameter is not specified. The V1 parameter
specifies that a task is visible to down-level systems.
Using the Code
Script
@ECHO OFF
@setlocal enableextensions
@cd /d "%~dp0"

SET PGPATH=C:\"Program Files"\PostgreSQL\9.1\bin\
SET SVPATH=f:\
SET PRJDB=demo
SET DBUSR=postgres
FOR /F "TOKENS=1,2,3 DELIMS=/ " %%i IN ('DATE /T') DO SET d=%%i-%%j-%%k
FOR /F "TOKENS=1,2,3 DELIMS=: " %%i IN ('TIME /T') DO SET t=%%i%%j%%k

SET DBDUMP=%PRJDB%_%d%_%t%.sql
@ECHO OFF
%PGPATH%pg_dump -h localhost -p 5432 -U postgres %PRJDB% > %SVPATH%%DBDUMP%

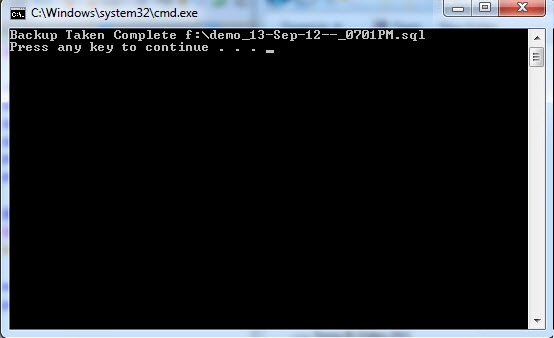
echo Backup Taken Complete %SVPATH%%DBDUMP%
Initial Value
PGPATH - PostgreSQL pathSVPATH - Backup File pathPRJDB - Name of the Database which will be backupDBUSR - Database user name
References
