Introduction
Last article we have seen Setup creation for Windows App with creating connection string now
We are going to see same concept in Web Application,which has WCF service.
Steps to Proceed
Step1: We need to create setup file for WCF service project with dynamic Connection string framing.
Step2: Creating another setup for Web Application which need to consume Service url of WCF for Communication between WCF service and Web App
Setup creation for WCF project
Preliminary Information for Setup creation
- For basic information regarding Adding setup project,Input rendering ,Connection string framing refer this article
http://www.codeproject.com/Tips/446121/Adding-connection-String-During-Installation
Customizing Installer to Create Connection String

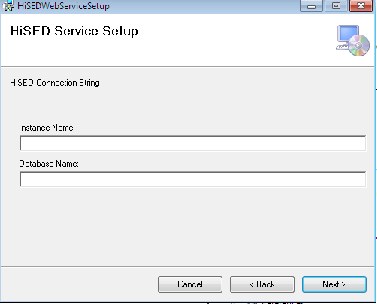
With this we will take Instance name and Database name from user during Installation.
Adding Primary Output file
Here we need to select both primary out file and content files,set all copy to local property to true for all dlls.

Adding Custom Action Data
In this step we are passing the input connection string parameters

Now Straight away I am moving to next step finding the file path and creating virtual directory
dataSource = "Data Source = " + dataSource + ";Integrated Security=SSPI;";
string configFile=string.Concat(Assembly.GetExecutingAssembly().Location,"Web.config");
int index = configFile.IndexOf("bin");
configFile = configFile.Substring(0, index);
VirtualDirectoryMapping vdm = new VirtualDirectoryMapping(configFile, true);
WebConfigurationFileMap wcfm = new WebConfigurationFileMap();
wcfm.VirtualDirectories.Add("/", vdm);
System.Configuration.Configuration webConfig =
System.Web.Configuration.WebConfigurationManager.OpenMappedWebConfiguration(wcfm, "/");
string connectionsection =
webConfig.ConnectionStrings.ConnectionStrings["ConnectionString"].ConnectionString;
ConnectionStringSettings connectionstring = null;
if (connectionsection != null)
{
webConfig.ConnectionStrings.ConnectionStrings.Remove("ConnectionString");
}
connectionstring = new ConnectionStringSettings("ConnectionString", dataSource);
webConfig.ConnectionStrings.ConnectionStrings.Add(connectionstring);
webConfig.Save();
ConfigurationManager.RefreshSection("connectionStrings");
- If we found any Connection string is available in web.confg we will remove and add a new connection based on the input provided by the user.
Web.Config Connection String section
<connectionStrings>
<add name="ConnectionString" connectionString="Data Source=Instancename;Initial Catalog=Databasename;Integrated Security=SSPI"
</connectionStrings>- Now setup file is ready to install once we perform build and it will host in IIS.
Point To Remember
- We are altering this section in web.config,Here key name should match to the key name that is providing in installer class(add name="ConnectionString").
Creating setup file for Web Application
- During installation of this setup we need to provide a text box to take service URL in order to communicate with WCF service.
- Provide a Text box,primary output file and content files,Custom action data which was explained in above mentioned article.
We need to provide service url obtained after running the service
Custom Text box added during installation for providing endpoint URL

<client>
<endpoint address="http://localhost:8080/HiSEDService.svc" binding="basicHttpBinding" bindingConfiguration="BasicHttpBinding_IHiSEDService" contract="WCFService.IHiSEDService" name="BasicHttpBinding_IHiSEDService"/>
</client>
We need to insert a new service url of endpoint adress ("http://localhost:8080/HiSEDService.svc")
This url helps in creating a platform to communicate.
string dataSource = Context.Parameters["Serviceurl"];
string configFile = string.Concat(Assembly.GetExecutingAssembly().Location,"Web.config");
int index = configFile.IndexOf("bin");
configFile = configFile.Substring(0, index);
VirtualDirectoryMapping vdm = new VirtualDirectoryMapping(configFile, true);
WebConfigurationFileMap wcfm = new WebConfigurationFileMap();
wcfm.VirtualDirectories.Add("/", vdm);
System.Configuration.Configuration webConfig =
System.Web.Configuration.WebConfigurationManager.OpenMappedWebConfiguration(wcfm, "/");
ServiceModelSectionGroup smsg =
webConfig.GetSectionGroup("system.serviceModel") as ServiceModelSectionGroup;
int value = smsg.Client.Endpoints.Count;
smsg.Client.Endpoints[0].Address = new Uri(dataSource);
webConfig.Save();
Here we are locating the file path and mapping it and creating vritual directory in IIS and replaces the endpoint adress url in web.config.
Now Installer is ready to install once build is completed.
