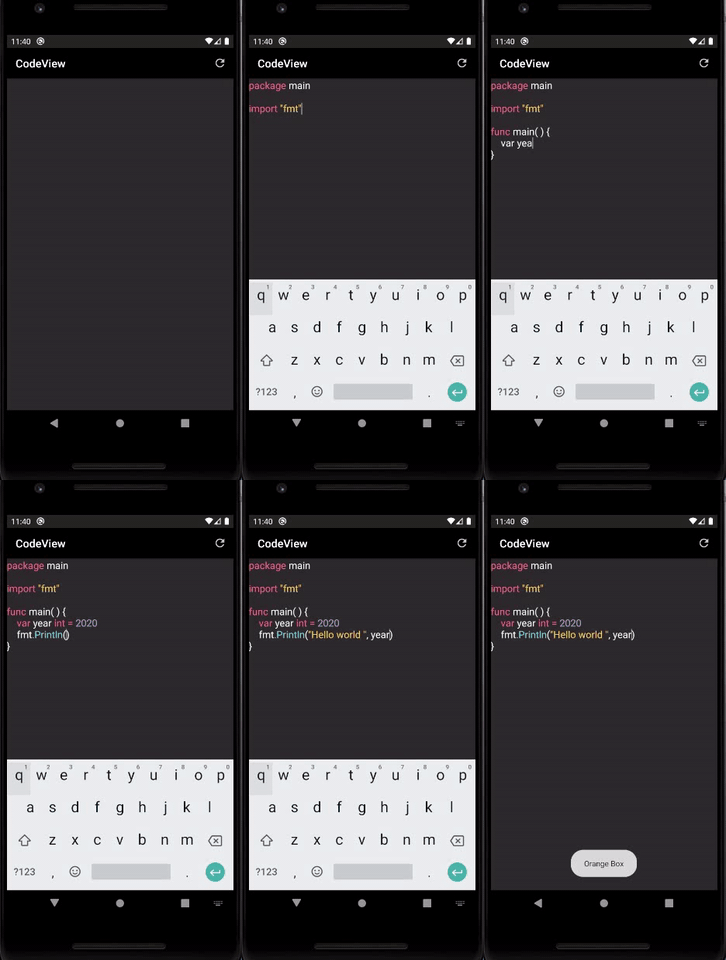
This article is about creating a Code Editor Android application that not only can support any programming language like Java, C, C++, or Go but can also support your own programming language if you have created one and want to create an app for it.
Features
Before we start creating the Code Editor app, for example, we will create it for Golang, We need to create a requirement list for this app, for example, we need our Code Editor to support the following:
- Syntax highlighter for GoLang
- Support multi-theme and the ability to change the theme in the runtime
- Error highlighter to highlight errors and warns
- Highlight TODO Comment with different colors like JetBrains IDEs
- AutoComplete based on our Language keywords
Implementation
So now, we can start working on the project feature by feature.
We will use CodeView Library to help us create this CodeEditor.
After we start a new project, we need to add the library to it.
In build.gradle file, we will add jitpack support to download CodeView Library:
allprojects {
	repositories {
	   ...
	   maven { url 'https://jitpack.io' }
	}
}
In dependency file, we will add CodeView, then sync the gradle to download it:
dependencies {
     implementation 'com.github.AmrDeveloper:CodeView:1.0.0'
}
Now it's time to add CodeView to the XML layout. For this example, we will use activity_main:
<com.amrdeveloper.codeview.CodeView
    android:id="@+id/codeView"
    android:layout_width="match_parent"
    android:layout_height="match_parent"
    android:background="@color/darkGrey"
    android:dropDownWidth="@dimen/dimen150dp"
    android:dropDownHorizontalOffset="0dp"
    android:dropDownSelector="@color/darkGrey"
    android:gravity="top|start" />
Now we need to configure the View to work with GoLang so we will create a simple Java class that contains the configuration for CodeView and set colors for every attribute on your language, for example, color for number and color for string, etc.
public class GoSyntaxManager {
private static final Pattern PATTERN_KEYWORDS =
Pattern.compile("\\b(break|default|func|interface|case|defer|" +
"go|map|struct|chan|else|goto|package|switch|const" +
"|fallthrough|if|range|type|continue|for|import|return|var|" +
"string|true|false|new|nil|byte|bool|int|int8|int16|int32|int64)\\b");
private static final Pattern PATTERN_BUILTINS = Pattern.compile("[,:;[->]{}()]");
private static final Pattern PATTERN_NUMBERS = Pattern.compile("\\b(\\d*[.]?\\d+)\\b");
private static final Pattern PATTERN_CHAR = Pattern.compile("'[a-zA-Z]'");
private static final Pattern PATTERN_STRING = Pattern.compile("\".*\"");
private static final Pattern PATTERN_HEX = Pattern.compile("0x[0-9a-fA-F]+");
private static final Pattern PATTERN_TODO_COMMENT = Pattern.compile("//TODO[^\n]*");
private static final Pattern PATTERN_COMMENT =
Pattern.compile("//(?!TODO )[^\\n]*" + "|" + "/\\*(.|\\R)*?\\*/");
private static final Pattern PATTERN_ATTRIBUTE = Pattern.compile("\\.[a-zA-Z0-9_]+");
private static final Pattern PATTERN_OPERATION =
Pattern.compile( ":|==|>|<|!=|>=|<=|->|=|>|<|%|-|-=|%=|\\+|\\-|\\-=|
\\+=|\\^|\\&|\\|::|\\?|\\*");
public static void applyMonokaiTheme(Context context, CodeView codeView) {
codeView.resetSyntaxPatternList();
codeView.setBackgroundColor
(codeView.getResources().getColor(R.color.monokia_pro_black));
codeView.addSyntaxPattern
(PATTERN_HEX, context.getResources().getColor(R.color.monokia_pro_purple));
codeView.addSyntaxPattern
(PATTERN_CHAR, context.getResources().getColor(R.color.monokia_pro_green));
codeView.addSyntaxPattern
(PATTERN_STRING, context.getResources().getColor(R.color.monokia_pro_orange));
codeView.addSyntaxPattern
(PATTERN_NUMBERS, context.getResources().getColor(R.color.monokia_pro_purple));
codeView.addSyntaxPattern
(PATTERN_KEYWORDS, context.getResources().getColor(R.color.monokia_pro_pink));
codeView.addSyntaxPattern
(PATTERN_BUILTINS, context.getResources().getColor(R.color.monokia_pro_white));
codeView.addSyntaxPattern
(PATTERN_COMMENT, context.getResources().getColor(R.color.monokia_pro_grey));
codeView.addSyntaxPattern
(PATTERN_ATTRIBUTE, context.getResources().getColor(R.color.monokia_pro_sky));
codeView.addSyntaxPattern
(PATTERN_OPERATION, context.getResources().getColor(R.color.monokia_pro_pink));
codeView.setTextColor( context.getResources().getColor(R.color.monokia_pro_white));
codeView.addSyntaxPattern
(PATTERN_TODO_COMMENT, context.getResources().getColor(R.color.gold));
codeView.reHighlightSyntax();
}
}
In MainActivity, now we need to initalize the CodeView and set the configuration:
public class MainActivity extends AppCompatActivity {
private CodeView mCodeView;
@Override
protected void onCreate(Bundle savedInstanceState) {
super.onCreate(savedInstanceState);
setContentView(R.layout.activity_main);
mCodeView = findViewById(R.id.codeView);
GoSyntaxManager .applyMonokaiTheme(this, mCodeView);
configLanguageAutoComplete();
}
private void configLanguageAutoComplete() {
final String[] languageKeywords = getResources().getStringArray(R.array.go_keywords;
final int layoutId = R.layout.suggestion_list_item;
final int viewId = R.id.suggestItemTextView;
ArrayAdapter<String> adapter = new ArrayAdapter<>(this, layoutId, viewId,
languageKeywords);
mCodeView.setAdapter(adapter);
}
}
Now our CodeEditor is ready with all the features that we want.
We can also add hint, warn and error support easily, for example, to add error, hint, warn line highlighter, you can use this function to set the line number and color.
codeView.addErrorLine(lineNumber, color);
You can remove the syntax or error highlighter.
codeView.resetSyntaxPatternList();
codeView.removeAllErrorLines();
Result

And the library contains some other features that you may want to use.
Check the library repository to see the documentation and code examples for Java, Python.
History
- 4th November, 2020: Initial version
