A how-to that will enable you to add a custom HTTP response header to identify the node that served the request.
Introduction
Recently, I've been migrating sites and services from a single server to a load-balanced high-availability environment with multiple nodes. On a few occasions, things weren't quite right across all the nodes in the environment so I had to find a way of identifying which nodes were not playing nicely.
Background
"Why don't you just add a custom response header via the web.config file?", I hear you ask.
The trouble with that approach in this situation is that the web applications and services are replicated using Microsoft DFS. So if I edit an application's web.config file on one node, the change is propagated across all nodes and each node would produce the exact same response header. Hmmm...
Enter the unsung hero: the humble IIS module.
An IIS module allows you to inject functionality into the IIS request/response pipeline. So I created one that would look up a system/machine environment variable and add it to the response headers with the name of "ServedBy", e.g.: ServedBy: node1
I know, not super creative. But it works.
Using the IIS Module
Add the ServedByHeader.dll file to the bin directory of the site/service (Download ServedByHeader.zip).
Register the module in the web.config file, like so:
<system.webServer>
    <modules>
        <add name="ServedByHeader" type="COGWare.ServedByHeader" />
    </modules>
</system.webServer>
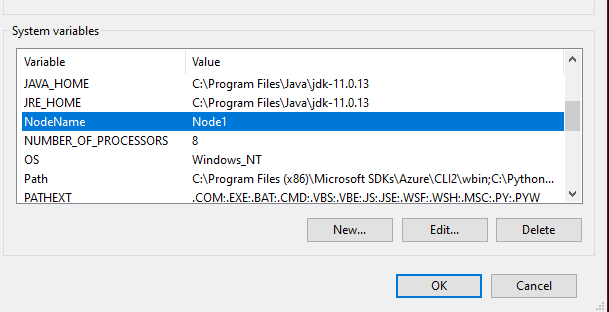
Now for the hardest part: add a system/machine environment variable called "NodeName" and give it an appropriate value - node1, node2, dev1, dev2, etc. But please don't let my lack of creativity stifle your elite naming prowess!

It is important to note that setting the environment variable via the GUI may require a restart before it becomes available - not ideal when your server is chasing 99.99% uptime.
Setting environment variables via the command prompt is quite simple and does not require a reboot of the server, e.g.:
SET NodeName=Node1
You can test the newly created environment variable by executing this at the command prompt:
ECHO %NodeName%
Any requests that are handled by managed code will now sport the ServedBy response header, e.g.:


Source Code
For those wise souls that don't just go downloading DLLs willy-nilly off the internet, here is the source code.
Thanks for reading!
History
- 16th February, 2024: Initial version
