Introduction
This article provides a simple class to create and run a Self-Hosted Web API service. This article assumes that the reader has a working knowledge of Web API and how the routing and controllers work in Web API.
Note that a self-hosted Web API application requires elevated administrative privileges to run. Alternately, you can instruct windows to give your account permission to Listen on the specified port you intend running the Web API Service:
netsh http add urlacl url=http:
where the Listening Port is the port your service is configured to listen on. In the case of the default for the Web API class this is port 8080. the Domain / Machine Name is the location your user is logging into followed by your user login. This line will allow http connections to the specified port be allowed to the listening service.
This privilege can be removed by the following command line:
netsh http delete urlacl url=http://+:{Listening Port}/Preparation
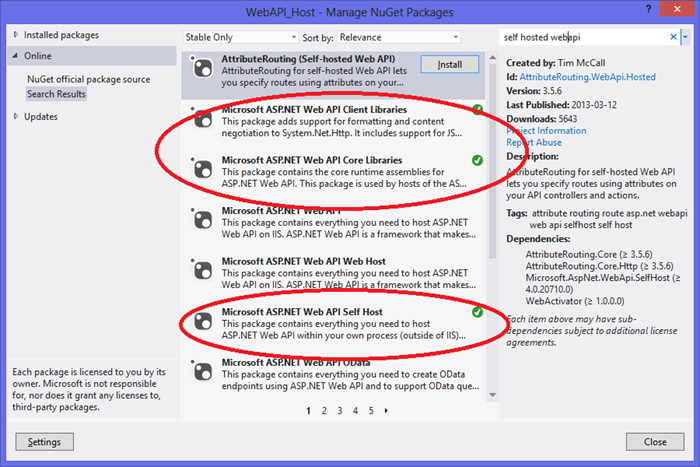
In order to use the Self-Hosted Web API libraries, they must be installed in the project. This can be done through NuGet.

The client and core libraries are needed on the Controller projects, while the Web API Self Host is required for the listening service.
Using the code
To use the class you need to instantiate it. By default the class constructor is created with a Base Address or
http://localhost:8080. There is an override allowing the creator to specify a Base Address for the listener.
WebAPI_Host.WebAPI_Host host = new WebAPI_Host.WebAPI_Host();
WebAPI_Host.WebAPI_Host host = new WebAPI_Host.WebAPI_Host("http://127.0.0.1:8088");
The next step is to specify to the Host which DLL it should use for its function processing. In the attached demo project I created two DLLs each with an
ApiController derived class. They get added to the host as follows:
string sTest1ControllerFileName = string.Format("{0}\\TestController.dll",
Path.GetDirectoryName(Assembly.GetExecutingAssembly().Location));
host.AddLibrary(sTest1ControllerFileName);
sTest1ControllerFileName = string.Format("{0}\\TestController2.dll",
Path.GetDirectoryName(Assembly.GetExecutingAssembly().Location));
host.AddLibrary(sTest1ControllerFileName);
The caller should specify the Route the controllers will be exposed through.
host.AddRoute("Default", "api/{controller}/{id}", new { id = RouteParameter.Optional });
And that is it, done. The only thing left to do is to start the host service. The internals of the WebAPI takes care of everything else.
host.StartWebAPIHost();
The test application attached in the download includes calls to the hosted controllers using dot net’s HTTP components. While the test application is running,
the user can also open Internet Explorer and browse to "http://localhost:8080/api/Test1"
or "http://localhost:8080/api/Test2".
Running the test application should show the following results:

