Introduction
Here we will see how to create a custom dialog box in Android and get results from that dialog box.
Background
Dialog box is mainly a popup or we can say a prompt that opens in front of the current activity to perform some operation or functionality.
You can use a dialog box to ask the user to confirm an action, notify the user of an event, or prompt the user for additional information. Because dialog boxes disrupt
the flow of the UI, you should use them only as a last resort. In most cases, you should integrate confirmation, feedback, and prompts directly into your app.
When a dialog box opens the current activity by which we open the dialog box goes to the background and
the dialog box comes in the foreground. After performing the operation
on the dialog box we dismiss the dialog box and the background activity comes
back to the foreground.
Using the Code
Dialog is the base class for creating a dialog box.
Create a project with the following details:
ProjectName: CustomDialogBox PackageName: sat.tuts4mobile.customdialogbox ActivityName: CustomDialogActivity
In the CustomDialogActivity.java file, copy the following code:
package sat.tuts4mobile.customdialogbox;
import android.app.Activity;
import android.app.Dialog;
import android.os.Bundle;
import android.view.View;
import android.view.View.OnClickListener;
import android.view.Window;
import android.widget.Button;
import android.widget.EditText;
import android.widget.TextView;
public class CustomDialogActivity extends Activity {
Button buttonDialog;
TextView textDialog;
@Override
protected void onCreate(Bundle savedInstanceState) {
super.onCreate(savedInstanceState);
setContentView(R.layout.activity_main);
textDialog = (TextView)findViewById(R.id.textView1);
buttonDialog = (Button)findViewById(R.id.buttondialog);
buttonDialog.setOnClickListener(new OnClickListener() {
@Override
public void onClick(View v) {
showCustomDialog(textDialog);
}
});
}
protected void showCustomDialog(final TextView _textDialog) {
final Dialog dialog = new Dialog(CustomDialogActivity.this);
dialog.requestWindowFeature(Window.FEATURE_NO_TITLE);
dialog.setContentView(R.layout.customdailog);
final EditText editText = (EditText)dialog.findViewById(R.id.editText1);
Button button = (Button)dialog.findViewById(R.id.button1);
button.setOnClickListener(new View.OnClickListener() {
@Override
public void onClick(View v) {
_textDialog.setText(editText.getText().toString());
dialog.dismiss();
}
});
dialog.show();
}
}
In the activity_main.xml file, copy the following code:
="1.0"="utf-8"
<RelativeLayout xmlns:android="http://schemas.android.com/apk/res/android"
android:layout_width="match_parent"
android:layout_height="match_parent"
android:padding="10dip">
<Button
android:id="@+id/buttondialog"
android:layout_width="fill_parent"
android:layout_height="40dip"
android:layout_alignParentBottom="true"
android:layout_centerHorizontal="true"
android:text="Click to show dialog"
android:background="#336699"
android:textSize="25sp"
android:textColor="#ffffff"/>
<TextView
android:id="@+id/textView1"
android:layout_width="wrap_content"
android:layout_height="wrap_content"
android:layout_centerHorizontal="true"
android:layout_centerVertical="true"
android:text=""
android:textSize="25sp"/>
</RelativeLayout>
Create a new XML file named customdialog.xml and copy the following code:
="1.0"="utf-8"
<RelativeLayout xmlns:android="http://schemas.android.com/apk/res/android"
android:layout_width="match_parent"
android:layout_height="wrap_content"
android:padding="5dip"
android:background="#336699">
<EditText
android:id="@+id/editText1"
android:layout_width="fill_parent"
android:layout_height="wrap_content"
android:layout_alignParentLeft="true"
android:ems="10"
android:hint="enter text to display"
android:singleLine="true">
<requestFocus />
</EditText>
<Button
android:id="@+id/button1"
android:layout_width="120dip"
android:layout_height="40dip"
android:layout_below="@+id/editText1"
android:layout_centerHorizontal="true"
android:layout_marginTop="17dp"
android:text="Submit"
android:textSize="25sp"
android:background="#669900" />
</RelativeLayout>
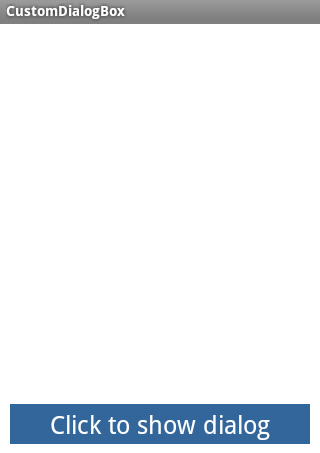
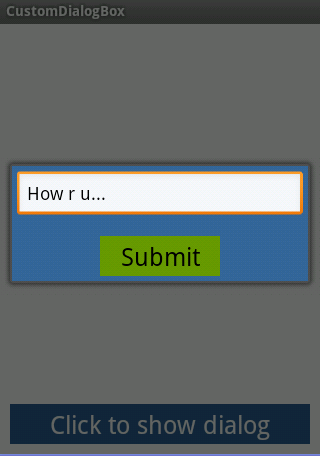
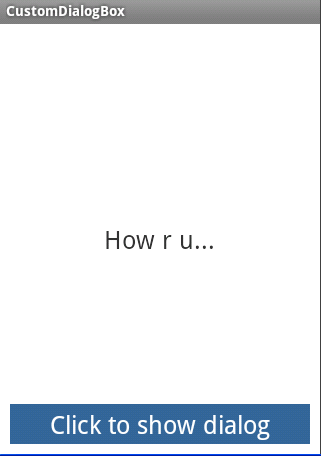
When you run the application you see the following screens:


Points of Interest
You can follow my blog at http://tuts4mobile.blogspot.in for mobile application related articles.
