Introduction
This article targets at understanding Excel file manipulations programmatically using C#. As this article is intended for the beginner/intermediate level, a quick demonstration of read/write operations on Excel files is supplied with the help of a sample WinForms application.
Background
Very often we work with MS Office tools like Word, Excel, PPT, etc.. And there is a definitive way to work with these applications using the .NET Framework.
The features implemented in the attached app include:
- Loading an Excel file
- Read/Write from/to Excel
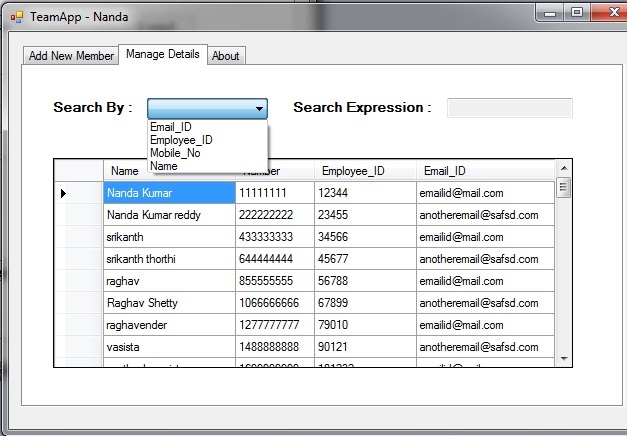
- Search contents of Excel using various filters
Let's find out how the above operations are implemented in the below sections.
Assumptions
This app can only manipulate Excel with four columns, i.e., Name, Emp_ID, Email_ID, and Mobile_No.
Description
In order to use Excel operations in VS, the first and foremost thing to do is to include the Microsoft.Office Object Library reference to the project.
Doing so will enable us to use the namespace Microsoft.Office.Interop.Excel. This namespace is widely referred in the project, hence I have assigned an alias name 'Excel'.
using Excel=Microsoft.Office.Interop.Excel;
Classes used
Excel.Application -Top level object in the Excel object model, used to specify application level properties and application level methodsExcel.Worbook - Represents a single workbook within the Excel applicaExcel.Worksheet - A member of the Worksheets collection in the
Workbook object
Let's declare these variables for further usage.
private static Excel.Workbook MyBook = null;
private static Excel.Application MyApp = null;
private static Excel.Worksheet MySheet = null;
Initialize the Excel
MyApp = new Excel.Application();
MyApp.Visible = false;
MyBook = MyApp.Workbooks.Open(DB_PATH);
MySheet = (Excel.Worksheet)MyBook.Sheets[1];
lastRow = MySheet.Cells.SpecialCells(Excel.XlCellType.xlCellTypeLastCell).Row;
Please note that
the Workbooks.open(string) method is used to open an Excel workbook by passing the file path as
a parameter to this method. By default, every workbook created has three worksheets. In this example, we have opened the first worksheet using MyBook.Sheets[1].
The last used row in Excel can be calculated using the SpecialCells method with
the xlCellTypeLastCell parameter.
Reading From Excel
The below piece of code demonstrates reading of Excel sheet cells and storing each row in an Employee object.
BindingList<Employee> EmpList = new BindingList<Employee>();
for (int index = 2; index <= lastRow; index++)
{
    System.Array MyValues = (System.Array)MySheet.get_Range("A" +
       index.ToString(), "D" + index.ToString()).Cells.Value;
    EmpList.Add(new Employee {
      Name = MyValues.GetValue(1,1).ToString(),
      Employee_ID = MyValues.GetValue(1,2).ToString(),
      Email_ID = MyValues.GetValue(1,3).ToString(),
      Number = MyValues.GetValue(1,4).ToString()
    });
}
To my surprise, here we have used BindingList for Employee objects rather than
a normal List. The reason behind this usage is that, any
modification to BindingList will cause the component model object to refresh (if the data source of the UI element is set as
a BindingList object). This feature is not achievable using a traditional
list.

The get_Range(string, string) method takes
the start cell (e.g., A1 ) and end cell (e.g., G4) as parameters and returns all the cell values in this range as a two dimensional array. Therefore, the values are added to the
Employee BindingList as an Employee object.
Writing to Excel
lastRow += 1;
MySheet.Cells[lastRow, 1] = emp.Name;
MySheet.Cells[lastRow, 2] = emp.Employee_ID;
MySheet.Cells[lastRow, 3] = emp.Email_ID;
MySheet.Cells[lastRow, 4] = emp.Number;
EmpList.Add(emp);
MyBook.Save();
The employee details captured in the UI are passed in the form of
an object. These values are assigned to the appropriate cells [row_number, column_number].
The Workbook.Save() method is used to save the applied changes to the opened file.

Points of Interest
Filtration of employee details using emp_name, emp_id, email_id,
and mobile is also featured in this app. Many more methods area available in the
Application, WorkBook, and Worksheet classes. Do check them out!
