Welcome back to day 9!
Were you wondering why there was a large gap between today and the last post? Well that’s because I went to participate in the Seattle AR/VR hackathon #6!
The hackathon was 3 days long and it took me 2 days to recover from it! Check out my hackathon postmortem!
With the hackathon over, I’m back to my regularly scheduled daily posting! Yay!
Continuing from where we last left off...
The next thing to do is to attach a weapon to our character and then add the game logic for shooting.
As usual let’s get to it!
Adding Our Weapon
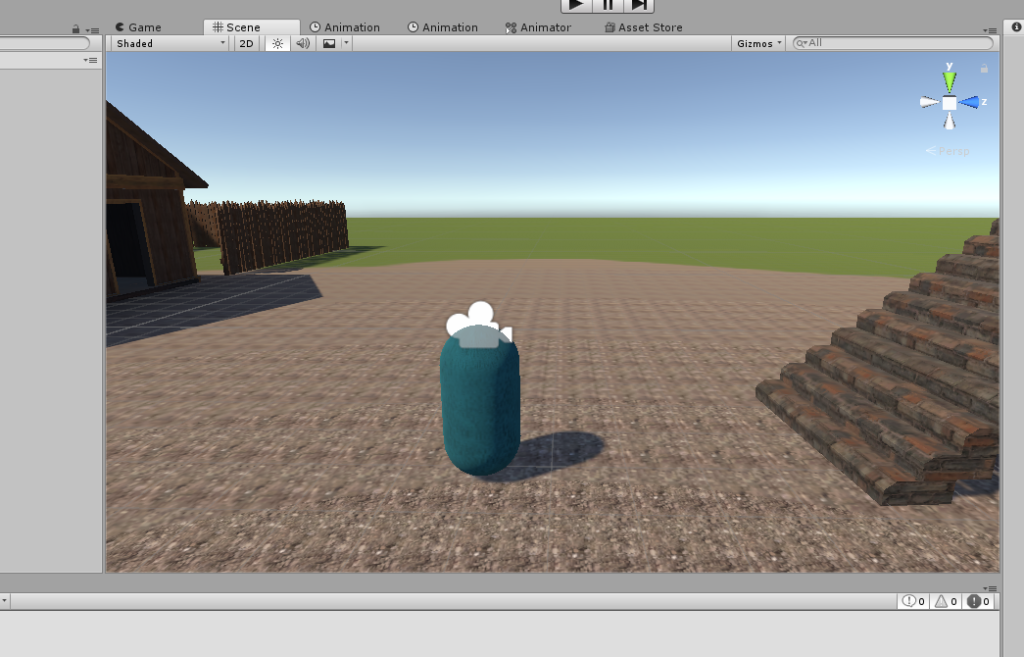
In our current state, we just have our character:

We need to add a weapon and from my research, in most games, when a player shoots, it’s not actually from the gun, it’s from the camera’s center view.
Not only that, we don’t actually shoot any projectiles as that can become computationally expensive. Instead, we just fire a Raycast and if we hit, we do some gun animation effect to make it appear that the bullets are coming from the gun.
For larger weapons like rocket launchers, we have to create the projectiles, but for a fast shooting weapon like an assault rifle or pistol, we can just use a Raycast.
Creating Our Weapon
The first thing we should do is create our “gun”. I’m sure we can grab a gun asset from the game store, but instead, I’m going to first create a simple cube that’ll represent our weapon. I’m sure later on we can just attach the asset and *most likely* everything will be fine. Probably…
First, let’s create a Cube and make it the child of our Main Camera. I’m going to name it Gun. I set the transform to these values:
Position: (0.25, -0.5, 1)Scale: (0.25, 0.25, 1)
Make sure to disable/remove the Box Collider that gets created with the Cube. If we have it, our player object will collide with the gun causing unintended consequences.
With our addition, we should have something like this:

If we look at our Game tab, we should see something like this:

Next, we can add some particle effect or something along the lines of that to give the illusion that we’re firing.
I won’t lie and say I know exactly what I’m doing (I don’t), but for now, I’m going to create a simple Particle system and attach it to the tip of the gun.
My intention is that I’ll play the particle effect when we fire and stop it when we stop.
So the first thing that we need to do is to create a new Particle System and make it the child of Gun.
I did some configuration settings such as changing the Z position to 0.2.
And here are the rest of the configurations:
- Duration: 1
- Looping: unchecked
- Start Lifetime: 0.05
- Start Speed: 5
- Start Size: 1
- Start Color: Yellow
- Play Awake: unchecked
Here’s what it’ll look like and the settings. It doesn’t look great, but I’m sure if we had a material asset we could make this better.

Adding the Shooting Script
Next up, I created the shooting script and attached it to our Main Camera. The script will be called PlayerShootingController.
Here’s what a simple shooting script would look like:
using UnityEngine;

public class PlayerShootingController : MonoBehaviour
{
    public float Range = 100;

    private Camera _camera;
    private ParticleSystem _particle;

	void Start () {
	    _camera = Camera.main;
	    _particle = GetComponentInChildren<ParticleSystem>();
	}

	void Update () {

	    if (Input.GetMouseButton(0))
	    {
            Ray ray = _camera.ScreenPointToRay(Input.mousePosition);
            RaycastHit hit = new RaycastHit();

	        if (Physics.Raycast(ray, out hit, Range))
	        {
	            print("hit " + hit.collider.gameObject);

	            _particle.Play();
            }
	    }
	}
}
Nothing in this code is particularly complex. We just created a Ray from wherever our mouse is located at and then if we were to hit something, we would print what we hit and play our particle system.

We want to do more like create a layer mask for our raycast to collide with (such as the Shootable layer), but that’s for another day.
End of Day 8
That’s it for today! Short? Yeah I know, great right?
To summarize what we accomplished today: we created the beginning of our shooting system.
We added a fake gun that is a child of the camera so that whenever we move our mouse, the gun will stay in front of our camera.
Then we added a particle system that will generate particles whenever we shoot.
In the future, I’d like to go back and figure out how to make the particles look more realistic: probably by using better materials for the particle system, but we’ll figure that out when we get there.
Finally, we created a script that will shoot raycasts to where our mouse is pointing at in the screen. We should really make that the center, but that’s something we can fix tomorrow.
Well, it’s been a long day, I’ll see you all tomorrow!
Day 8 | 100 Days of VR | Day 10
The post Day 9 Setting up a Weapon appeared first on Coding Chronicles.
CodeProject
