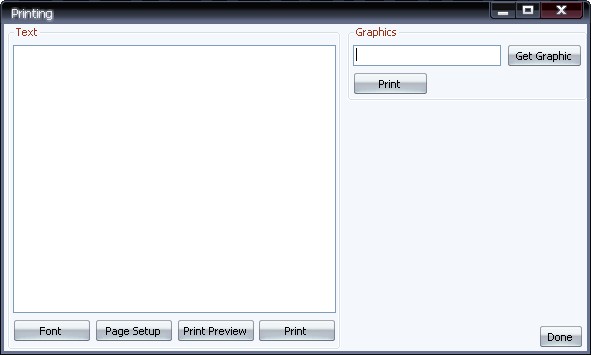
Introduction
Printing can be a complicated process, depending on what you want to print, and how you want to configure it. Luckily, .NET 2.0 has helped make the process easier, but it can still be a little confusing at times, especially when dealing with advanced printing configuration. So, this article will show you where to begin the printing process.
Beginning
Now to start, you will have to include a major part of the .NET Framework, System.Drawing.Printing, which handles all generic printing. And, there are four controls that have to be added to your form, the PrintDocument, PrintDialog, PrintPreview, and the PageSetup controls. Now, the PrintDialog control is not required, but is a good thing to include because it allows the user to select printer properties, page numbers, and many other essential options.
Setting Up to Print
Now, you will have to prepare everything to print your document. The TextPrint procedure will set the text that will be printed, the font, and the color to print in, and the Brush color. Like so:
Private Sub TextPrint(ByVal sender As Object, ByVal e As PrintPageEventArgs)
    e.Graphics.DrawString(TextToPrint.Text, _
        New Font(TextToPrint.Font, TextToPrint.Font.Style), Brushes.Black, 120, 120)
    e.HasMorePages = False
End Sub
Next, you will call the PrintPreview control, which will allow you to see how the text looks before the page is printed. The actual dialog used for this isn't as nice looking as all the other dialogs. The dialog will look like this:

Now, to call the code that will send the preview control the text and the font settings:
Private Sub PreviewText_Click(ByVal sender As System.Object, _
        ByVal e As System.EventArgs) Handles PreviewText.Click
  Try
    PrintTextControl.DefaultPageSettings = PrintPageSettings
    PrintString = TextToPrint.Text
    PreviewPrint.Document = PrintTextControl
    PreviewPrint.ShowDialog()
  Catch ex As Exception
    MsgBox(ex.Message)
  End Try
End Sub
The PageSetup control is next, and is very simple. All you do is send all the selected settings in the control to the PrintDocument control.
Private Sub PageSetup_Click(ByVal sender As System.Object, _
        ByVal e As System.EventArgs) Handles PageSetup.Click
  Try
    SetupPage.PageSettings = PrintPageSettings
    SetupPage.ShowDialog()
  Catch ex As Exception
    MsgBox(ex.Message)
  End Try
End Sub
And the window will look like this:

Finally, before getting to the actual printing, you have to call the PrintDocument control to start the printing. Here, when the button BeginTextPrint is clicked, it will show a Print dialog, which will look like this:

Private Sub BeginTextPrint_Click(ByVal sender As System.Object, _
    ByVal e As System.EventArgs) Handles BeginTextPrint.Click
  If PrintWin.ShowDialog = Windows.Forms.DialogResult.OK Then
    Try
      AddHandler PrintTextControl.PrintPage, AddressOf Me.TextPrint
      PrintTextControl.Print()
    Catch ex As Exception
      MsgBox(ex.Message)
    End Try
  End If
End Sub
Printing Text
We are now done with all the preparation, and are ready to do the actual printing. This is where it can get confusing for some people. In the PrintDocument.PrintPage (PrintTextControl), you will use the following code:
Private Sub PrintTextControl_PrintPage(ByVal sender As System.Object, _
ByVal e As System.Drawing.Printing.PrintPageEventArgs)_
Handles PrintTextControl.PrintPage
PrintTextControl.DocumentName = "Test Document"
Dim PrintFont As New Font(TextToPrint.Font, TextToPrint.Font.Style)
Dim numChars As Integer
Dim numLines As Integer
Dim stringForPage As String
Dim strFormat As New StringFormat
Dim rectDraw As New RectangleF(e.MarginBounds.Left, _
e.MarginBounds.Top, e.MarginBounds.Width, e.MarginBounds.Height)
Dim sizeMeasure As New SizeF(e.MarginBounds.Width, _
e.MarginBounds.Height - PrintFont.GetHeight(e.Graphics))
strFormat.Trimming = StringTrimming.Word
e.Graphics.MeasureString(PrintString, PrintFont, sizeMeasure, _
strFormat, numChars, numLines)
stringForPage = PrintString.Substring(0, numChars)
e.Graphics.DrawString(stringForPage, PrintFont, _
Brushes.Black, rectDraw, strFormat)
If numChars < PrintString.Length Then
PrintString = PrintString.Substring(numChars)
e.HasMorePages = True
Else
e.HasMorePages = False
PrintString = TextToPrint.Text
End If
End Sub
Everything in the code above sets page properties and takes settings set by other controls, users, and dialogs, puts them together, sets the page up (line/letter spacing) and the font. This is where most of the configuration goes on.
Now, about all the settings. The PrintTextControl.DocumentName sets the name of the document that will be printed. This is also useful if the user has multiple documents standing in line in the Print Spooler so they can distinguish which document is which. And the StringTrimming sets the amount of words and lines that can fit on a single page.
Printing Graphics
Printing graphics isn't much different than printing text (for a basic configuration). All you will have to do is use the following code:
Private Sub GraphicPrint(ByVal sender As Object, ByVal e As PrintPageEventArgs)
    e.Graphics.DrawImage(Image.FromFile(GraphicLocation.Text), _
        e.Graphics.VisibleClipBounds)
    e.HasMorePages = False
End Sub

Private Sub BeginGraphicPrint_Click(ByVal sender As System.Object, _
        ByVal e As System.EventArgs) Handles BeginGraphicPrint.Click
    Try
      AddHandler PrintGraphicControl.PrintPage, AddressOf Me.GraphicPrint
      PrintGraphicControl.Print()
    Catch ex As Exception
      MsgBox(ex.Message)
    End Try
End Sub
This is basically the same as the first bit of code used for the text printing, with only a few modifications. The main key is that you will have to use a separate PrintDocument control for the graphic printing. And, you won't need to add any settings to it (for a basic configuration). The reason that printing graphics doesn't require properties to be set in its PrintDocument control is because the program doesn't have to set fonts, line/letter spacing and etc., to the print control, unlike text printing.
Conclusion
Besides the coding, the explanation of printing is difficult. The comments inside the code should provide you with further explanations of how everything works. Also, inside the example program, I included a Font dialog to give you an example of how to print different types of fonts as well as different colors.
