Introduction
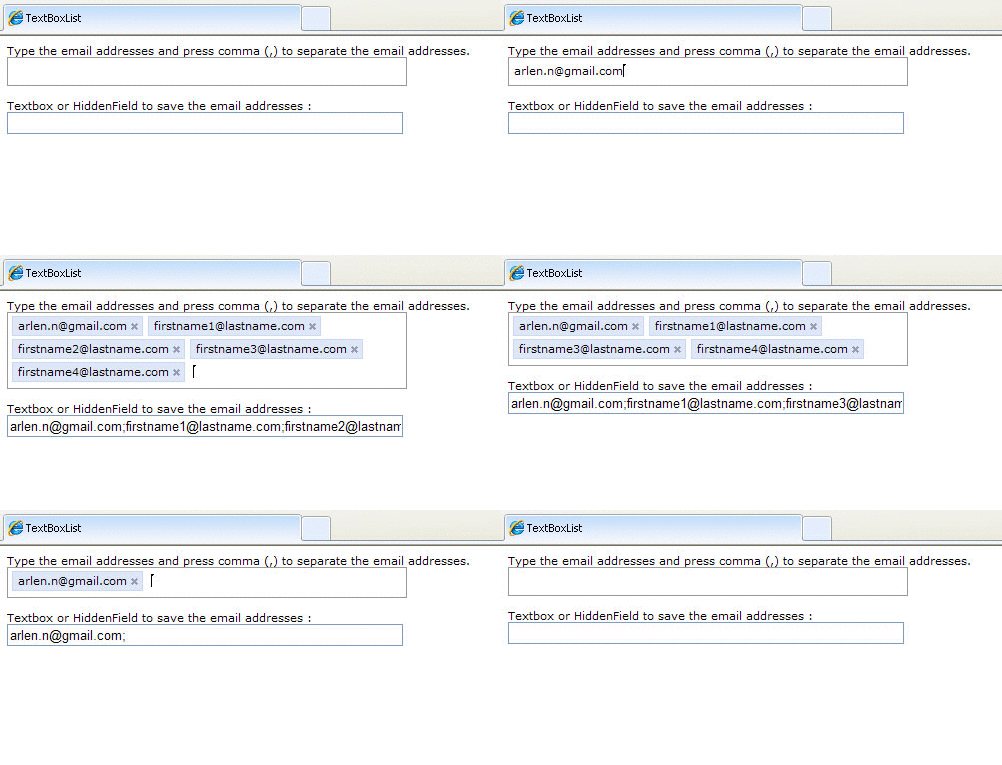
TextboxList is a user friendly control that allows you to manage multiple inputs using a single text box, instead of having multiple text boxes. So if you really need a multi-input textbox, this control will help you and keep your web form more clear for the users.
You have probably seen this control on Facebook or Yahoo! Mail before. Here is a simple version of the TextboxList.
Using the code
User interface
First of all, I am going to explain the user interface of this control. The combination of div tags, UL, LI elements, and HTML Input creates our TextboxList. The control contains a div tag, unordered list, list item, and the input box. The following is the structure of the control.

 <div class="textboxlist" id="mydivTextBox">
     <ul class="textboxlist-ul" id="myListbox">
    <li class="textboxlist-li textboxlist-li-editable"
                   style="display: block;" id="liTypeHere">
           <input type="text" class="textboxlist-li-editable-input"
              style="width: 10px;" id=" TypeHere" maxlength="35"/>
    </li>
     </ul>
</div>
Inside a div tag, there is a UL, the UL contains LI, and LI contains an HTML Input. The next part is applying the CSS to the HTML elements. The CSS plays a main role in this UserControl.
The ul in itself is a block-level element; however, the lis are also block-level elements. All of the elements surrounding the list items are inline elements. Pretty boring, huh? All of that CSS for just a few lines of lousy HTML. This is the secret behind the creation of inline CSS UL, just remember that you want the UL items to be a series of inline elements. From here on out, we can style our inline UL to our liking. If you are unfamiliar with CSS, then I recommend you visit the CSS Tutorials and learn CSS!
.textboxlist-ul
{
  overflow: hidden;
  margin: 0;
  padding: 3px 4px 0;
  border: 1px solid #999;
  padding-bottom: 3px;
}
.textboxlist-li
{
   list-style-type: none;
   float: left;
   display: block;
   padding: 0;
   margin: 0 5px 3px 0;
   cursor: default;
}
For sample and editable code, please download the file!
Client side script
The user starts typing in the input box; once the user presses comma ',' on the keyboard (',' is used for separating list items in the input text), the following steps are run:
- Check for input validation.
- Create the list item based on user entry value on fly and apply the CSS to it.
- Save the entry value into a textbox or hidden field.
- Push the input box to the right side and set the properties of the new entry point.
TypeHere.keyup(function (e) {
switch (e.keyCode) {
case 188:
var myInputLength = TypeHere.val().length;
var myInputText = TypeHere.val().substring(0,
myInputLength - 1);
TypeHere.width(myInputLength * 6 + 15);
var emailReg = /^([\w-\.]+@([\w-]+\.)+[\w-]{2,4})?$/;
if (myInputText.length == 0) {
TypeHere.val('');
return false;
}
if(!emailReg.test(myInputText)) {
alert('Email Is Invalid');
TypeHere.val('');
return false;
}
CreateLi(myInputText)
var strValue = txtValues.val() + myInputText + ';';
txtValues.val(strValue);
TypeHere.width(myInputLength * 6 + 15);
liTypeHere.css('left', TypeHere.position().left +
TypeHere.width() + 10);
TypeHere.val('');
TypeHere.width(10);
break;
}
});
Once the user presses ',', the CreateLi(myInputText) function is fired. The function creates the ListItem element on the fly.
function CreateLi(strValue) {
var strHTML = $("<li class='textboxlist-li textboxlist-li-box " +
"textboxlist-li-box-deletable'>" + strValue +
"<a href='#' class='textboxlist-li-box-deletebutton'></a></li>");
var size = $("#myListbox > li").size();
if (txtValues.val().length == 0) {
$("#myListbox").prepend(strHTML);
}
else {
$("#myListbox li:nth-child(" + size + ")").before($(strHTML));
}
}
And for the deletion option, we need to apply the click event to the delete icon of LI.

$("a").live('click',function (e) {
e.preventDefault;
$(this).parent().remove();
var txtValues = $("input[id$='txtValues']");
var strUpdate= txtValues.val();
strUpdate = strUpdate.replace($(this).parent().text() + ";",'');
txtValues.val(strUpdate);
});
