Introduction
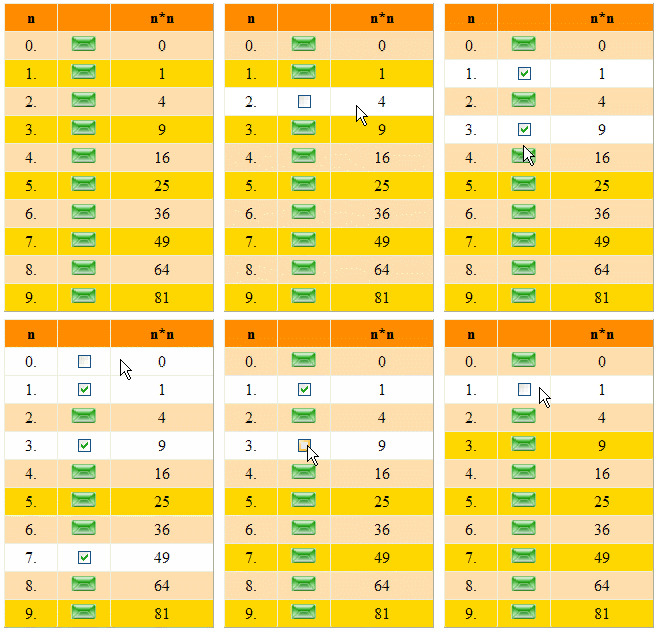
If you have a Hotmail Windows Live ID email account, then you have already observed mouse over and mouse out effects on the rows of an Inbox’s grid. On a mouse over event of any row of the Inbox’s grid, a CheckBox appears in place of an Image. Similarly, on a mouse out event, an Image appears in place of a CheckBox.
There are three types of images that appear in place of a CheckBox. If the message is unread, then the 
Image appears. If the message is read, then the 
Image appears. If the message has been replied to, then the  Image appears.
Now if we make a CheckBox checked that appears on a row due to a mouse over event, then the mouse over and mouse out effects on that row get disabled. If we make that CheckBox unchecked, then the mouse over and mouse out effects start to work for that row again.
Now I'm going to present this functionality with the help of the GridView control. In this small application, I'm going to use only a single Image rather than use all three images. On a mouse over event for a row, a CheckBox will appear. On a mouse out event, an Image will appear. If we make CheckBox checked, then the mouse over and mouse out effects on that row will get disabled. Further, on making that CheckBox unchecked, mouse over and mouse out effects will start to work for that row again.
I have also implemented row coloring of GridView on mouse over and mouse out events in this application.
HTML Code
Use a TemplateField inside the GridView and put a CheckBox and an Image in the ItemTemplate of the TemplateField. The HTML code for GridView will look like this:
<asp:GridView ID="gvHotmail" runat="server" AutoGenerateColumns="False"
    OnRowDataBound="gvHotmail_RowDataBound">
            <Columns>
                <asp:BoundField HeaderText="n" DataField="n">
                    <HeaderStyle Width="50px" />
                    <ItemStyle Width="50px" />
                </asp:BoundField>
                <asp:TemplateField>
                    <ItemTemplate>
                        <input id="chkBxMail" type="checkbox" runat="server" />
                        <asp:Image ID="imgMail" runat="server" ImageUrl="~/mail.png" />
                    </ItemTemplate>
                    <HeaderStyle Width="50px" />
                    <ItemStyle Width="50px" />
                </asp:TemplateField>
                <asp:BoundField HeaderText="n*n" DataField="nn">
                    <HeaderStyle Width="100px" />
                    <ItemStyle Width="100px" />
                </asp:BoundField>
            </Columns>
            <HeaderStyle Height="25px" BackColor="DarkOrange"
                HorizontalAlign="Center" VerticalAlign="Middle" />
            <RowStyle Height="25px" BackColor="NavajoWhite"
                HorizontalAlign="Center" VerticalAlign="Middle" />
            <AlternatingRowStyle Height="25px" BackColor="Gold"
                HorizontalAlign="Center" VerticalAlign="Middle" />
 </asp:GridView>
C# Code
Put the following code in the RowDataBound event of GridView:
if (e.Row.RowType == DataControlRowType.DataRow && (
    e.Row.RowState == DataControlRowState.Normal || e.Row.RowState ==
    DataControlRowState.Alternate))
        {
            HtmlInputCheckBox chkBxMail =
                (HtmlInputCheckBox)e.Row.Cells[1].FindControl("chkBxMail");
            Image imgMail = (Image)e.Row.Cells[1].FindControl("imgMail");

            e.Row.Attributes["onmouseover"] =
                string.Format("javascript:ItemMouseOver(this,'{0}','{1}');",
                chkBxMail.ClientID, imgMail.ClientID);
            e.Row.Attributes["onmouseout"] =
                string.Format("javascript:ItemMouseOut(this,'{0}','{1}');",
                chkBxMail.ClientID, imgMail.ClientID);

            chkBxMail.Attributes["style"] = "display:none;";
        }
In the above code, first I have ensured that the row is either Normal or Alternate. After that, I have gotten the references of the CheckBox and Image controls and attached client-side mouse over and mouse out events on them. I have also added a style [display:none;] on the CheckBox control so that initially CheckBox will not appear.
JavaScript Code
Put this JavaScript in the page's head section.
<script type="text/javascript">
    function ItemMouseOver(oRow, chkBxMail, imgMail)
    {
        oCheckBox = document.getElementById(chkBxMail);
        oImage = document.getElementById(imgMail);

        if(!oCheckBox.checked)
        {
            oCheckBox.style.display = '';
            oImage.style.display = 'none';
            oRow.originalBackgroundColor = oRow.style.backgroundColor
            oRow.style.backgroundColor = 'White';
        }
    }

    function ItemMouseOut(oRow, chkBxMail, imgMail)
    {
        oCheckBox = document.getElementById(chkBxMail);
        oImage = document.getElementById(imgMail);

        if(!oCheckBox.checked)
        {
            oCheckBox.style.display = 'none';
            oImage.style.display = '';
            oRow.style.backgroundColor = oRow.originalBackgroundColor;
        }
    }
</script>
In the above script, there are two functions: ItemMouseOver and ItemMouseOut. ItemMouseOver is called on mouse over events and ItemMouseOut is called on mouse out events for GridView rows. In the ItemMouseOver function, CheckBox appears and Image disappears. In the ItemMouseOut function, CheckBox disappears and Image appears. In both functions, appearing/disappearing effects will reflect provided the CheckBox is unchecked. I have also used some coloring effects on mouse over and mouse out effects respectively.
Supporting Browsers
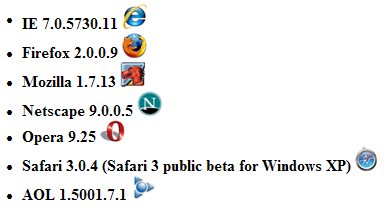
I have tested this script on the following browsers:

History
- 30 January, 2008 -- Original version posted
- 6 February, 2008 -- Article edited
- 5 March, 2008 -- Article updated
