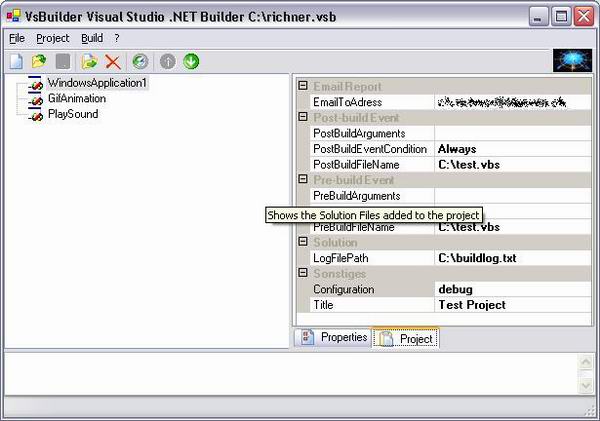
This screenshot shows a little app which is based on this class.
Index
18.02.2003
10.02.2003
- Well documented, NDoc generated help file available for download.
- Add support to open file from command line (e.g. "Open" item in Context menu with %1) at startup.
- Removed
RecentProjectMenuItem Property with virtual method OnVisualizeRecentMenu which provides a ArrayList with Actions to build your own UI Recent Menu.
- Add property
EnableRecentMenu to disable this feature.
- Add property
RecentMenuMaxItems to control length of items.
15.01.2003
- Bug fixed with form title, updated downloads.
21.12.2002
Did you ever want to code a little utility that should manage a project file? I coded this on my own a few times, and now it’s time for me to create a class library. This article shows you how to use this class library, which enhances a normal windows form to a project file managing form. All the workflows needed like new, open, save, save as and close are implemented. It’s very easy to use this class, and you could develop straight forward, cause all the business logic is implemented in the base class, everything you need to do is override the methods and write your own important code, the code that is related to project specific implementation.
Key features are:
- Standard implementation de/serialize
IProject from/to xml file.
- Using ActionList for UI Components, this means you could use your own classes for UI, only business logic is implemented
- Components are enabled/disabled case sensitive to reflect project state
- Needed workflows are implemented
- You can control your program by overriding methods
- After 5 minutes you are ready to implement the logic you need, you don’t have to manage project file states on your own
- State of the art like “Recent Files” and standard shortcuts are implemented
- You build your task on a tested framework in a short time
This article is based on
ActionLists for Windows.Forms by Serge Weinstock.
The majority of knowledge I've got about C# was from code project articles. I think it's very important to give something back to this community, so I started to write my own articles, hoping someone finds my articles and code useful.
The following graphic shows the concept behind this class. There is a UI component which represents your
Form, and a project class which is nothing else than your project file. You inherit a
Form from
ProjectEnvironmentForm, put your UI controls as you like on it, attach the inherited
Actions to your UI Controls, and on the fly you got New, Open, Save, Save As and Close Controls, with a nice Icon and the standard shortcuts, sound nice, eh ?
But at this time you’ve got no project file, sorry, class, that’s why there is a interface called IProject. Your project class inherit from IProject, implements all the methods and properties from this interface, and on the fly you’re able to manage the project class by the Form you just created a step before.

First of all you need to create a new windows forms project, or load your own project. Now you need to add a reference to the
ProjectEnvironment.dll, otherwise you add the project to your solution by “Add Existing Project” and add a project related reference to the project you like to extend.
Now you create the project class, which inherits from ProjectEnvironment.Project.IProject. You need now to implement the required methods and properties specified by this interface. This looks like this:
public class Project : ProjectEnvironment.Project.IProject
{
private bool isDirty;
private string title;
public event EventHandler Dirty;
public Project()
{
}
public bool IsDirty
{
get
{
return this.isDirty;
}
set
{
this.isDirty = value;
}
}
public void ResetDirty()
{
IsDirty = false;
}
public void OnLoad()
{
}
public void OnSave()
{
}
public void OnNew()
{
this.title = "Write something here";
}
public string Title
{
get
{
return this.title;
}
set
{
this.title = value;
OnDirty();
}
}
private void OnDirty()
{
this.isDirty = true;
if (Dirty != null)
{
Dirty(this, EventArgs.Empty);
}
}
After you did this, you’ve got a valid project class which can be handled by ProjectEnvironmentForm.
ProjectEnvironmentForm is the base windows form, you need to inherit from. There are three properties you need to set before this class can work properly. Your constructor should look like this:
public class Form1 : ProjectEnvironment.ProjectEnvironmentForm
{
public Form1()
{
InitializeComponent();
this.ProjectType = typeof(Project);
this.ShellExtensionFilter = "All files (*.*)|*.*";
this.EnableRecentMenu= true;
}
}
The second thing you should is to override the property IsProjectValid, which means if a valid project file is loaded.
public override bool IsProjectValid
{
get
{
return base.IsProjectValid;
}
set
{
base.IsProjectValid = value;
}
}
The third thing is to create a new CurrentProject property, which returns your own project type, otherwise you have to cast always from IProject to your project type.
new public Data.Project CurrentProject
{
    get
    {
        return base.CurrentProject as Data.Project;
    }
}
If you like to use the Most Recent Items feature, you need to override method. You need to update your Menu to reflect current recent list provided as ArrayList.
protected override void OnVisualizeRecentMenu(
ArrayList actionListRecentItems)
{
this.menuRecentItems.MenuItems.Clear();
for(int i =0;i<actionListRecentItems.Count;i++)
{
MenuItem item = new MenuItem();
((Actions.Action)actionListRecentItems[i]).Parent.SetAction(
item,actionListRecentItems[i]as Actions.Action);
this.menuRecentItems.MenuItems.Add(item);
}
}
Now we need some Menu Item's and Toolbar Buttons to enable the user to control our project file. Your form now looks like every form, it’s a blank from. We need to do the following steps:
- Add a Main Menu
- Add File Menu Item to Main Menu
- Add 6 MenuItem’s to File Menu Item
- Add a Toolbar { or everything else that inherits from component }
Now you’ve got a form that looks funny, but not for long time. In the designer click now the first of the six Menu Item's, hit F4 for property dialog, and choose on “Action on action List” actNew. Do this for each of the six Menu Item's, until your form looks like the screenshot. The Exit Menu Item could not be attached to a base class Action, but you could extend the Action List with your own Actions, e.g. for the “Exit” Menu Item.
Now your Menu Item's are attached to the Actions, which means nothing else than the Menu Item's can now control the business logic implemented by the base class ProjectEnvironmentForm. The next step is to attach the same Actions to your Toolbar Buttons, set Appearance to Flat and add four buttons to it, now attach the Actions to the buttons.
After these steps your form should have a UI that looks like this
Now the user should be able to New, Open, Save, Save As and Close the project via
MenuItem’s or the Toolbar Buttons. The
MenuItem’s or Toolbar Buttons (
Actions) should enable/disable to reflect the current project state. If the user changes a property of the project, the save action should be enabled, or if the user tries to close the form, the Save Dialog should appear.
Now it’s time to implement your project related business logic, e.g. your project is based on
Title property. Let me give you a small example of how you can do this as you can see it on my example project.
First of all you need to add Textbox and Label Controls to your form. Should look something like this:
Now you extend your CurrentProject like this:
public override bool IsProjectValid
{
get
{
return base.IsProjectValid;
}
set
{
base.IsProjectValid = value;
this.textBox1.Enabled = value;
if (value)
{
this.textBox1.DataBindings.Add("Text",
this.CurrentProject,"Title");
}
else
{
this.textBox1.DataBindings.Clear();
this.textBox1.Text = "";
}
}
}
With these changes you enabled the Textbox to display the Title property of the current loaded/showed project file, otherwise if no valid project is displayed the Textbox is disabled.
These methods could be overridden to control everything the way you like it or you need it for your current task. You could even call the base class methods with
base.OnXX() and add your code to execute both, your own code and the base class code, as you know it from framework classes.
protected virtual Project.IProject OnNew()
{
}
protected virtual void OnNewBefore()
{
}
protected virtual void OnNewAfter()
{
}
protected virtual bool OnCloseBefore()
{
}
protected virtual bool OnClose()
{
}
protected virtual void OnCloseAfter()
{
}
protected virtual bool OnSaveBefore(string path, object project)
{
}
protected virtual bool OnSaveAfter(string path, object project)
{
}
protected virtual bool OnSave(string path, object project)
{
}
protected virtual void OnOpenBefore(string path)
{
}
protected virtual void OnOpenAfter(string path)
{
}
protected virtual Project.IProject OnOpen(string path)
{
}
protected virtual void OnVisualizeRecentMenu(
ArrayList actionListRecentItems)
{
}
Now you should be able to use this little framework, to build your own project based tools and applications extremely fast. You can extend and alter the framework as you like, it should enhance only your start and guide you in a possible way to do stuff like this.
If you got any suggestions or bug-feedback feel free to drop me a note. Have fun with it.


 General
  News
News  Suggestion
  Question
  Bug
Bug  Answer
  Joke
Joke  Praise
  Rant
Rant  Admin
Admin 


