I’ve been working on a couple of projects recently where I’ve been storing the source in the cloud using Live Mesh so that I could access the solution from any of the PCs and laptops that litter the house. On the whole, this approach has worked fairly well, although it results in a lot of changes through Mesh and occasionally locks files. The other drawback is that there is no file versioning and I like to be able to rollback some changes if I decide the approach I’ve taken isn’t working out for me.
I’ve had prior history of working with a number of different source control solutions and though that Subversion might be a good fit for a Mesh-based repository. Unfortunately, after creating a repository in the Mesh, AnkhSVN wouldn’t recognise the Mesh folder as a valid repository, so I couldn’t connect to it. Having given up on the possibility of getting working version control in the Mesh, I found Ten steps on how to store Git repositories in Live Mesh! by Pål Fossmo. I’d seen a lot of buzz about Git, but never actually tried it, so it thought I’d give it a whirl. I was also interested in some kind of integration in Visual Studio and found the Git Extensions, which include an add-in for Visual Studio, so I modified the original approach slightly and came up with my own:
Ten Steps to Storing Git Repositories in the in Live Mesh
- Install.

Download and install Git Extensions from http://code.google.com/p/gitextensions (I used 1.62, but there is a version 1.64 as I write this post), which includes Git 1.6.2.2, by using the default values during installation.
- Mesh Account. Create a Live Mesh account if you don’t already have one at http://www.mesh.com.

Mesh Folder. Create a folder in the Mesh and synchronise it with the required devices. I called mine Repository.
- Local Repository. To create a local repository, navigate to the folder containing your source code, right-click, click Git GUI Here, and then click Create New Repository. In the Git Gui dialog, select the target folder, and then click Create. Git displays a dialog showing the files that will be added.
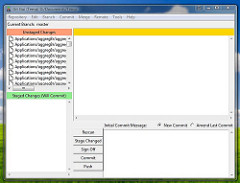
- Exclude Files. To exclude files that you don’t want to be version controlled, edit the file named exclude in: <New repository>\.git\info\. My exclude file uses the defaults for Visual Studio plus a few extras, such as *.vsmdi.
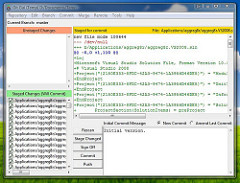
- Commit Initial Version. In the Git Gui dialog (from Step 4), click Rescan to update the list of files to be added, type “Initial version.” into the Commit Message box, and then click Commit.
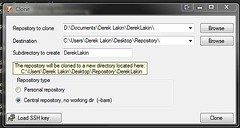 Clone the Repository into the Mesh. Open your solution in Visual Studio, and then open a file (any source file it doesn’t matter*). On the Git menu, click Clone repository. In the Clone dialog, make sure the Repository to clone folder is correct, select the destination folder, which is your Mesh folder, enter the name of the Subdirectory to create, select Central repository, no working dir (--bare), and then click Clone.
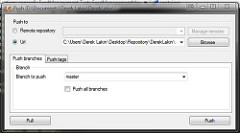
Push Changes to the Mesh. Commit local changes as usual by using the Commit button on the Git Extensions toolbar. When you are ready to push some changes into the Mesh: in Visual Studio, click Push changes to remote repository on the Git Extensions toolbar. In the Push dialog, select Url, click Browse to select the Mesh folder to push to, select master from the Branch to push list, and then click Push.
- Get Source Files on Different PC. Install Git Extensions as described in Step 1. Create a folder to contain the source files, and then create a local repository as described in Step 4. Update the exclude file as described in Step 5.
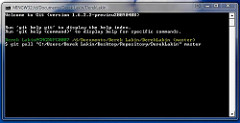
- Pull the Source From the Repository. Right-click the folder for the new repository, and then click Git Bash Here. In the command prompt, type:
git pull C:/Users/<user>/Desktop/Repository/<SubFolder> master. You now have the same source files on both PCs. You can use the push and pull buttons on the Git Extensions toolbar in Visual Studio to transfer changes via the Mesh.
* The Git Extensions add-in for Visual Studio is a regular add-in, not a source control provider. For any command to work, you must have a source file open.
Side Note
If you want to see your own name in the version history, click Settings on the Git Extensions toolbar, and enter your details on the Global Settings tab. You can also change the merge tool on this tab (I personally prefer SourceGear’s DiffMerge).

