Introduction
Automated end-to-end web application testing is one of the pillars in developing production applications. There are various test frameworks to increase the efficiency of QA. Recently, I had the opportunity to try out Cypress framework on a newly developed product. Cypress is a JS testing framework that runs in a browser and thus very well simulates the behavior of a real client. It is possible to write both GUI and API tests with it and it offers many interesting features.
As a fullstack developer, I am used to type-safe code from backend languages, so I use the TypeScript type extension for frontend development. I also consider it necessary to have the type-safe code for the E2E tests. On the official Cypress site, there are links to possible TypeScript settings, but at the time I wrote this article, these tutorials were not fully functional. They did not allow debugging in the source maps of the tests themselves.
This article describes how to create a test project that allows you to both write and fully debug in TypeScript source files.
Create a Project
First, initialize the npm project with the command:
npm init
Now install:
cypress - testing frameworktypescript - TypeScript compilerts-loader - Loader for TypeScript source codeswebpack - build tool@cypress/webpack-preprocessor - plugin file preprocessing using webpack
npm i cypress typescript ts-loader webpack @cypress/webpack-preprocessor --save
These are all the packages that are needed.
To configure typescript, create tsconfig.json in the root of project:
{
  "compilerOptions": {
    "strict": true,
    "noUnusedLocals": true,
    "noUnusedParameters": true,
    "noImplicitReturns": true,
    "noFallthroughCasesInSwitch": true,
    "noEmitHelpers": true,
    "noImplicitAny": true,
    "strictPropertyInitialization": true,
    "preserveConstEnums": false,
    "target": "es5",
    "lib": [
      "es5",
      "dom",
      "es2015.core",
      "es2015.promise",
      "es2015.iterable",
      "es2015.collection"
    ],
    "types": ["cypress"],
    "sourceMap": true,
    "reactNamespace": "b",
    "removeComments": false,
    "skipLibCheck": true,
    "skipDefaultLibCheck": true
  },
  "include": ["**/*.ts"]
}
This example contains the most strict restrictions for type safety.
The build tool for your testing project is webpack. To configure it, create webpack.config.js containing:
module.exports = {
  resolve: {
    extensions: [".js", ".ts", ".d.ts"]
  },
  module: {
    rules: [
      {
        test: /\.ts$/,
        use: [
          {
            loader: "ts-loader",
            options: { allowTsInNodeModules: true }
          }
        ]
      }
    ]
  },
  mode: "development"
};
Cypress Plugin for Webpack Preprocessing
To use @cypress-webpack-preprocessor, change cypress/plugins/index.js to look like the following:
const webpack = require("@cypress/webpack-preprocessor");
module.exports = (on, config) => {
const options = {
webpackOptions: require("../../webpack.config"),
watchOptions: {}
};
on("file:preprocessor", getWepPackWithFileChange(options));
};
function getWepPackWithFileChange(options) {
const webPackPreProcessor = webpack(options);
return function(file) {
file.outputPath = file.outputPath.replace(".ts", ".js");
return webPackPreProcessor(file);
};
}
This is the most important part because this allows you to compile and get source maps for debugging for both cypress commands and spec files.
Rename support/commands.js to cypress/support/commands.ts and add the following custom cy command:
declare namespace Cypress {
  interface Chainable<Subject> {
    customCommand(): Cypress.Chainable<null>;
  }
}

Cypress.Commands.add(
  "customCommand",
  (): Cypress.Chainable<null> => {
    return cy.log("TEST LOG");
  }
);
Now rename support/index.js to cypress/support/index.ts and ensure it contains the following:
import "./commands";
Cypress
Finally, change the main cypress config in cypress.json to use TypeScript spec and support files:
{
  "testFiles": "**/*.spec.ts",
  "pluginsFile": "cypress/plugins/index.js",
  "supportFile": "cypress/support/index.ts"
}
Testing
Now you can define one simple test in cypress/integration folder, e.g. cypress/integration/examples/test.spec.ts containing:
describe("Example", () => {
it("test", () => {
const testString = "test-string";
debugger;
cy.wrap(testString)
.should("exist", testString)
.customCommand();
});
});
Now you can run cypress tests as usual:
npx cypress open
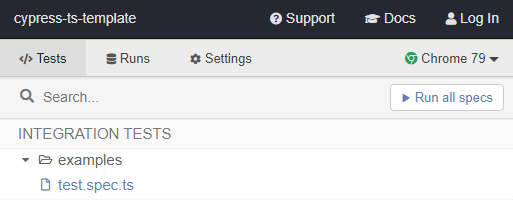
You can see that there is test.spec.ts in the list of tests.

If you now run tests with open developer tools, the debugger will stop at the debugger line. This is necessary to stop execution. After that, the debugger will also stop at your breakpoints. Note that debugging is directly in test.spec.ts, so in the original TypeScript code. You can also debug commands.

Conclusion
Cypress is a great tool for testing and I believe this article has helped you to improve its use.
History
- 16th January, 2020: Initial version
