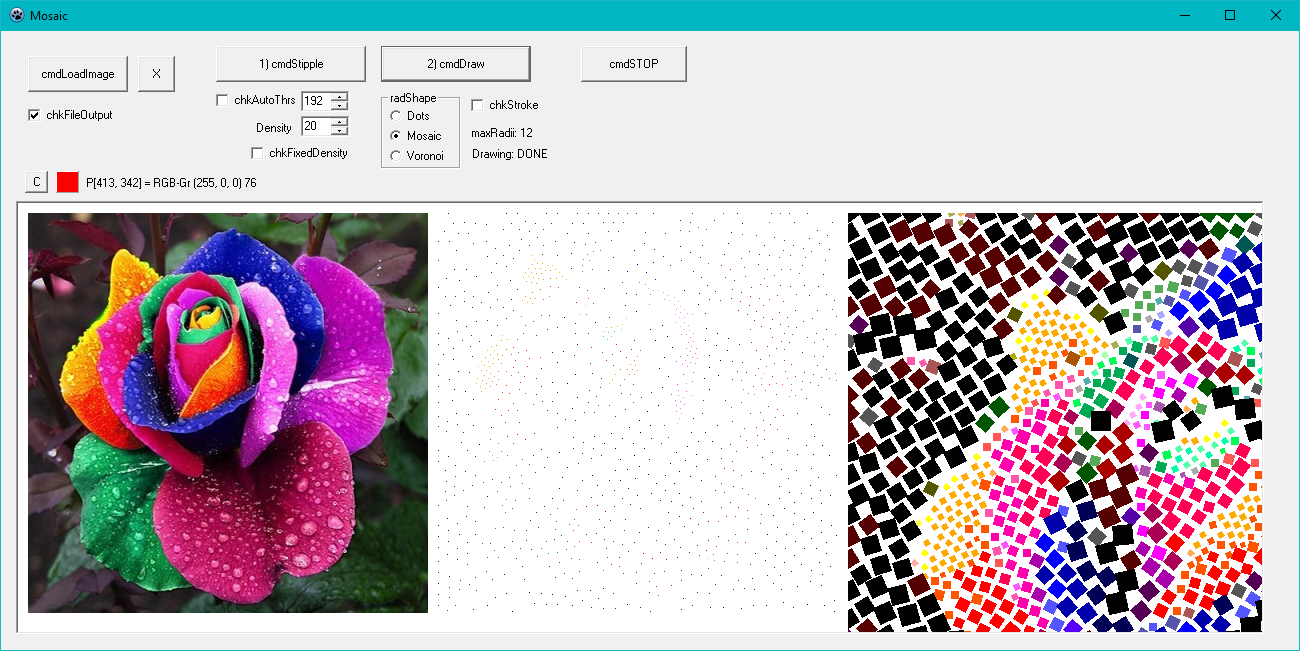
This method is based on calculating density-based kernel size, then taking a sample and eliminating the remaining neighbour points spanned by kernel.

Introduction
In this article, I'll present a new and a very simple method to resampling points from a digital image and drawing it looking like as antique mosaics, dots (stippling) and Voronoi cells. This method is based on calculating density-based kernel size, then taking a sample and eliminating the remaining neighbour points spanned by circular kernel.
Before you go on, I strongly recommend that you check the articles in the References section.
The common way to explain a method and its logical background is starting to show what we want to do:
The first step is to get resampling points and the second one is to draw what we want using these sampled points.
| Input Image | Sampled points |
 |  |
| Fake Antique Mosaics | Dots (Stippling) |
 |  |
| Voronoi Cells | Dots (stroke) |
 |  |
The Method
Technically, resampling a digital image is known as "spatial sampling". There are many sampling methods used in practice, such as regular grid, irregular grid, hexagonal grid, triangular grid, Poission disk sampling, random sampling, quassi-random sampling, etc. Some of these sampling methods have deep relations with statistical distributions. The main aim is to get a balanced distribution (i.e., sampling points) as statistically in math and as aesthetically in artistic stylisation. Here, I'll explain yet another sampling method based on density. For digital images, we accepts that "density" is the image's luminance (i.e., pixels' gray levels).
Steps
 | This is input image and its pixels.
Let's scan all pixels in the image over the following steps. |
 | 1. Convert image to grayscale. |
 | 2. Get gray values of each pixel. |
 | 3. Calculate circular kernel radius based on that gray values (i.e., density.) |
 | 4. Eliminate the remain neighbour pixels in circular kernel (window). |
 | 5. As a result, we've got a resampled pixel and the other white pixels. |
If we repeat these steps for each pixels, we get all resampled pixels. So, the first step is done.
After that, we'll draw some shapes based on those sampled pixels' color and related radius values calculated before. These are easier steps and don't need explanation.
So, now, please check the top images again as a lightened mind.
The Code
The formula for calculating the kernel radius is a calculated formula that is my own all property.
kernelRadius := (256 div density) - (gray div density);
Typical parameter values are 20 for density and 192 for threshold.
Using the Code
Lead with core punchline codes!
type
TCDots = record
Cx, Cy: integer;
CRadius: integer;
CColor: TColor;
end;
var
dots: array of TCDots;
...
...
SetLength(dots, nSize);
...
...
for y:=0 to H-1 do
begin
for x:=0 to W-1 do
begin
c := imgWork.Canvas.Pixels[x, y];
r := GetRValue(c);
g := GetGValue(c);
b := GetBValue(c);
gray := trunc(r * 0.2989 + g * 0.5866 + b * 0.1145 + 0.5);
kernelRadius := (256 div density) - (gray div density);
if chkFixedDensity.Checked then
kernelRadius := 16 - (gray div 32);
if (kernelRadius < 5) then kernelRadius := 5;
radii2 := kernelRadius * kernelRadius;
if (gray > threshold) then
begin
c1 := clWhite;
imgWork.Canvas.Pixels[x, y] := c1;
continue;
end;
for ky:=-kernelRadius to +kernelRadius do
begin
yy := y + ky;
if (yy < 0) then yy := 0; if (yy > H-1) then yy := H-1;
for kx:=-kernelRadius to +kernelRadius do
begin
xx := x + kx;
if (xx < 0) then xx := 0; if (xx > W-1) then xx := W-1;
if ( (ky = 0) and (kx = 0) ) then
c1 := c
else
c1 := clWhite;
if (kx*kx + ky*ky < radii2) then
begin
imgWork.Canvas.Pixels[xx, yy] := c1;
if (c1 <> clWhite) then
with dots[nCount] do
begin
Cx := xx;
Cy := yy;
CRadius := kernelRadius;
CColor := c1;
end;
end;
end;
end;
...
end;
...
end;
...
NOTE: For simplicity, here I've used Canvas.Pixels[..], but, to optimize for speed, please DON'T use Canvas.Pixels[..] in real applications.
Conclusion and Points of Interest
To be honest, nothing to discuss. To avoid more complex and expensive cost methods, please follow me. :)
References
- Article: Weighted Voronoi Stippling
- Article: Sample Elimination for Poisson Disk Sample Sets
- StippleGen: Weighted Voronoi stippling and TSP paths in Processing by Windell Oskay
- Voronoi Stippling by Mike Bostock
- Voronoi: Shrinking Circles Algorithm by Selim Tezel
- Book: Image and Video-Based Artistic Stylisation
History
- 7th April, 2022: Initial version
