Introduction
Activity is the essence of workflow; even the workflow itself is an Activity. WF4 provides some build-in activities that can be used directly in the workflow designer panel. But many times, we need to create our own activities—for example, an activity that can send e-mail to inform someone about finishing a task or any other important thing.
Background
To define our own activity, we should write a class that implements the root abstract Activity or one of its predefined subclasses.
Using the Code
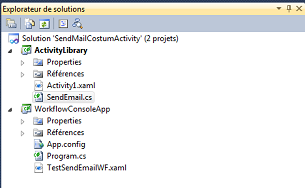
Before moving ahead, please create two projects. The first is the ActivityLibrary project named ActivityLibrary. The other is the Workflow Console Application named WorkflowConsoleApp.
Delete Workflow1.xaml, which is created by default. The ActivityLibrary project is for all customized activities, whereas the WorkflowConsoleApp project is used for testing our customized activities. The following screenshot shows the project structure:
- Step 1: Create the
SendEmail activity
Add a new code file to the ActivityLibrary project named SendEmail.cs. Then, fill the file with the following code:
using System.Activities;
public sealed class SendEmailActivity : CodeActivity
{
    public InArgument<string> from { get; set; }
    public InArgument<string> host { get; set; }
    public InArgument<string> userName { get; set; }
    public InArgument<string> password { get; set; }
    public InArgument<string> to { get; set; }
    public InArgument<string> subject { get; set; }
    public InArgument<string> body { get; set; }
    public OutArgument<string> result { get; set; }
    protected override void Execute(CodeActivityContext context)
    {
        var mailMessage = new System.Net.Mail.MailMessage();
        mailMessage.To.Add(to.Get(context).ToString());
        mailMessage.Subject = subject.Get(context).ToString();
        mailMessage.Body = body.Get(context);
        mailMessage.From =
        new System.Net.Mail.MailAddress(from.Get(context));
        var smtp = new System.Net.Mail.SmtpClient();
        smtp.Host = host.Get(context);
        smtp.Credentials =
        new System.Net.NetworkCredential(
        userName.Get(context), password.Get(context));
        smtp.EnableSsl = true;
        smtp.Send(mailMessage);
        result.Set(context, "Sent Email Successfully!");
    }
}
Then build the activity project so that SendEmail appears in the toolbox panel of the workflow designer.
- Step 2: Add a reference to
ActivityLibrary
In the WorkflowConsoleApp project, add an assembly reference to ActivityLibrary for us to be able to use these customized activities in the WorkflowConsoleApp project.
- Step 3: Create a workflow to test the
SendEmail activity
Add a new workflow in the WorkflowConsoleApp project and name it TestSendEmailWF.xaml. Create the workflow as shown in the following screenshot:

Save and build the solution.
- Step 4: Run it.
Alter the Main method of the Program.cs file to this:
static void Main(string[] args)
       {
           WorkflowInvoker.Invoke(new TestSendEmailWF());
       }
Set WorkflowConsoleApp as Startup project. Next, press Ctrl+F5 to run the workflow without debugging.
Points of Interest
Sending an e-mail usually costs some time. In real workflow applications, we should create an
asynchronous activity or an independent WF service to send e-mail.
History
- 21st August, 2013: Initial post

