Download C # Hadoop Visual Studio 13 Solution
Download SQL & Oracle Scripts
Download SSIS To Hadoop
Introduction
I’d like to show Microsoft developers that Hadoop & .Net are a combination of technologies that can work well together. By demonstrating how to setup, configure a Hadoop cluster, import data (from RDBMS, flat file etc.) , query data using Hive and also through a REST API, to eventually displaying the resulting dataset within your .Net\AngularJS applications – all from a Microsoft developer’s perspective.
We plan to import tables from Oracle and SQL Server. Then perform queries within Hortonworks Ambari Dashboard (Hive) to makes joins on the two tables (originating from different data sources) within one application.
I plan to demonstrate Hadoop interaction with the following technologies\applications:
- C# Console
- C# REST Service
- AngularJS
- SSIS
- SQL Server Linked Server
- Excel
- Query Hadoop from within Visual Studio IDE
Background
“From four nodes to the future of data…”
Back in 2003 Google invested in and invented the basic frameworks that constitute, what is today popularly called Hadoop. They faced the future first, with the problem of handling billions of searches and indexing millions of web pages. When they could not find any large scale, distributed, scalable computing platforms for their needs, they went ahead and created their own.
Doug Cutting (from Yahoo) was inspired by Google’s white papers and decided to create an open source project called “Hadoop”. Yahoo further contributed to this project and played a key role in developing Hadoop for enterprise applications. Since then, many companies such as Facebook, Linkedin, ebay, Hortonworks, Cloudera etc. have contributed to the Hadoop project.
The name itself came from Doug’s son toy elephant – Hadoop, ”...easy to remember and easy to Google…”
Terminology
Hadoop
Is a free Java-based programming framework that supports the processing of large data sets in a distributed computing environment. It is part of the Apache project sponsored by the Apache Software Foundation.
Sqoop
Apache Sqoop (pronounced scoop) is a tool designed for efficiently transferring bulk data between Apache Hadoop and structured datastores such as relational databases. Sqoop helps to move data between Hadoop and other databases and it can transfer data in parallel for performance
Hive
Apache Hive is a data warehouse infrastructure built on top of Hadoop for providing data summarization, query, and analysis. While initially developed by Facebook, Apache Hive is now used and developed by a number companies.
Hadoop Security
In a nutshell, the security layer is built upon Linux LDAP, when a RDBMS table is imported into Hadoop, it is in a flat file format (like CSV), and thus it is in a folder. The security revolves around restricting access to these folders.
MapReduce
Hadoop MapReduce is a software framework for distributed processing of large data sets on compute clusters of commodity hardware. It is a sub-project of the Apache Hadoop project. The framework takes care of scheduling tasks, monitoring them and re-executing any failed tasks.
The primary objective of Map/Reduce is to split the input dataset into independent chunks that are processed in a completely parallel manner. The Hadoop MapReduce framework sorts the outputs of the maps, which are then input to the reduce tasks. Typically, both the input and the output of the job are stored in a file system.
Download and install the following applications (if you have the full version installed, use that).
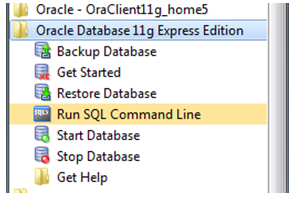
Once Oracle Express is install, you should find the entry within your start-up menu.
Open SQL Developer and connect to your Oracle Express (using the password you were prompted for during install for the SYSTEM user).

Open the Oracle script (attached at top) and execute it (clicking the green play button). This will create a new Oracle user and install a database, which contains the demo tables we will import into Hadoop later.
Once the script has finished, create a new connection to test that everything configured correctly – logging in as OracleHadoop/Finnharps1. These are the credentials you will use within Hadoop Sqoop to import the Artist table.
Once installed, make a note of your System Administrator (sa) password, open the attached SQL Server script and execute it by clicking on the green play button.
This will create the same database that you created earlier for Oracle Express. The idea is that we will import a table from Oracle and a table from SQL Server, and create a Hive query to perform the join in Hadoop on these tables.
We will now create a new SQL Server user, since we are using Oracle, its best to have a distinctive username for both database servers. Create a new SQL login called SQLServerHadoop with a password Finnharps1.
NB: you must have a strong password or Hadoop Sqoop will fail to connect to our database.
Below is SQL Server and Oracle database using the same table structure, created by the SQL scripts.
Install the VM player. Once the VM Sandbox has been downloaded, you can start the VM Player and play the Hortonworks sandbox you downloaded earlier.
As the VM loads the Sandbox, you will see script information being displayed as follows;
Once the VM has finally started, note IP address (mine below is 192.168.181.129).
Click <Alt + F5> to enter the VM and then enter the default VM login and password (root/hadoop). You may be prompted to change the password. Make a note of your new password.
Start Putty and enter the VM’s IP address.
Inside Putty, copy in the following command to see where you are within the VM:
pwd
Then enter the command to list the directory contents and sub-paths. You will notice I have already downloaded the Microsoft JDBC driver (the .tar file in red)
ls -la
NB: Blue coloured texts are folders.
Let’s download the Microsoft JDBC driver, unzip and copy the jdbc.jar file into the Sqoop lib folder.
NB To get your Sqoop directory path – enter the following into Putty:
ls -la /usr/bin/sqoop
Enter the following commands (one at a time) into Putty
cd /usr/local/

curl -L 'http://download.microsoft.com/download/0/2/A/02AAE597-3865-456C-AE7F-613F99F850A8/sqljdbc_4.0.2206.100_enu.tar.gz' | tar xz

cp sqljdbc_4.0/enu/sqljdbc4.jar /usr/hdp/current/sqoop-client/lib/
Execute the following SQL statement to determine if you’re “Shared Memory” transport congiguration needs to be changed.
NB: If you are executing SSIS packages from stored procedures within this SQL Server instance; you will want to undo your changes when finishing this tutorial.
SELECT
   CONNECTIONPROPERTY('net_transport') AS net_transport,
   CONNECTIONPROPERTY('protocol_type') AS protocol_type,
   CONNECTIONPROPERTY('auth_scheme') AS auth_scheme,
   CONNECTIONPROPERTY('local_net_address') AS local_net_address,
   CONNECTIONPROPERTY('local_tcp_port') AS local_tcp_port,
   CONNECTIONPROPERTY('client_net_address') AS client_net_address
If the code returns Shared Memory as the net_transport (as shown above), you’ll need to go into the SQL Server Configuration Manager, disable Shared Memory, make sure TCP/IP is enabled, and reboot the SQL Server service.
Rerun the SQL statement again and you should see your configuration properties below – make a note of the SQL Server IP address and port, as this will be used when importing table data from SQL Server by Hadoop’s Sqoop.
NB: password is plain-text, for test purpose only.
NB: The SQL Server password must comply with a strong password rules or Linux\Hadoop will throw an ambiguous error message.
Give the Root account permissions to write to HDFS by running the following commands (one at a time) in putty:
sudo -u hdfs hadoop fs -mkdir /user/root
sudo -u hdfs hadoop fs -chown root:root /user/root
Then enter the following commands into Putty to list available databases that Hadoop can import for this user (do not use localhost as the IP address as this will refer to the VM’s local server, we are looking for SQL Server on your desktop\server).
sqoop list-databases --connect jdbc:sqlserver:
Import the table Artist from SQL Server into Hadoop;
<a>sqoop import --connect "jdbc:sqlserver://192.168.1.100:1433;database=Chinook;username=SqlServerHadoop;password=Finnharps1" --table Artist --hive-import -- --schema dbo</a>
You will see information being displayed as the import process is in effect. Use <Ctrl> + PageUp\Down to view the details.
Finally, information regardingthe imported table will be displayed.
If you list the directoty contents you will now see a Java file for the imported table.
I have jumped ahead to show you the newly imported table from within HortonWork's Hive application.
We will import the Oracle driver the same way we imported the SQL Server driver.
Navigate to usr folder cd /usr/
wget <a href="https://afirs.googlecode.com/files/ojdbc6.jar">https:
In Putty navigate to /usr/ folder and list the contents to see the imported jar file.
Now let’s copy it to the Sqoop directory using the following command
cp ojdbc6.jar /usr/hdp/current/sqoop-client/lib/
Log into SQL Developer as the SYS user and run the following script for the user OracleHadoop:
GRANT DBA TO ORACLEHADOOP;


grant CREATE SESSION, ALTER SESSION, CREATE DATABASE LINK,
  CREATE MATERIALIZED VIEW, CREATE PROCEDURE, CREATE PUBLIC SYNONYM,
  CREATE ROLE, CREATE SEQUENCE, CREATE SYNONYM, CREATE TABLE,
  CREATE TRIGGER, CREATE TYPE, CREATE VIEW, UNLIMITED TABLESPACE
  to ORACLEHADOOP  ;
We can list the Oracle databases that Hadoop can see by executing the following command within Putty;
sqoop list-databases --connect jdbc:oracle:thin:@192.168.1.100:1521/xe --username ORACLEHADOOP --password Finnharps1
Now, imprt the Album database table into Hadoop
sqoop import --connect jdbc:oracle:thin:@192.168.1.100:1521/xe --username ORACLEHADOOP --password Finnharps1 --table ALBUM --hive-import
NB: This can be a time consuming process even for small data dumps!
List the contents of the usr directorty to see the newly imported ARTISTS (java) file.
View Java File
Enter the following command, to bring up the VI editor and see the (ORM) java class associated with the newly import Album table:
vi ALBUM.java
Enter the VM IP address into the browser, to be routed to the Hortonworks dashboard page (using the creentials admin\admin when prompted). From here we will be able to navigate to the Hiove query editor and perform some SQL statements on the newly imported tables.
NB: Even though the tables initially resised in RDBMS, in Hadoop there format is more akin to a CSV file (comma delimited).
Click on the menu box and select Hive from the dropdown list.
You will see the database explorer on the left hand side of the page, this will display the existing tables within the default database.
Simply enter a SQL statement into the editor and click teh (green) execute button to see the results rendered below;
If you click on table link, it will expand to display the table field structure.
Use the following Microsoft link to download the Hive ODBC driver (x32 or x64) and install it.
Create a “System DSN” with the following attributes – enter in your Hadoop VM IP address and click the Test button to make sure the connection is valid. In the advanced options, make sure to configure the String size to 8000 as this will cause an error when retrieving (n)varchar data from Hadoop.
Within SQL Server create new Linked Server entry by executing the following command (note the datasrc property is pointing to our newly craeted DSN).
EXEC master.dbo.sp_addlinkedserver @server = N'HiveFinnharps',
@srvproduct=N'HIVE', @provider=N'MSDASQL',
@datasrc=N'Microsost C# Hadoop',
@provstr=N'Provider=MSDASQL.1;Persist Security Info=True;User ID=root; Password=finnharps;'
The image below, shows how the SQL properties map up within our Linke Server entry;
To help you with the database, schema & table path, right click the table and click through to Select To -> Clipboard
Execute the following (inner join) statement to see the data from the Artist and Album tables.
A better example is outlined in the Visual Studio section below – but here is a quick reference on how to connect to Hadoop, execute a query and process it’s results.
static void Main(string[] args)
        {
            var conn = new OdbcConnection
            {
                ConnectionString = "Dsn=Microsost C# Hadoop;Uid=root;Pwd=finnharps;"
            };
            try
            {
                conn.Open();
                var adp = new OdbcDataAdapter("Select * from Artist limit 100", conn);
                var ds = new DataSet();
                adp.Fill(ds);
                foreach (var table in ds.Tables)
                {
                    var dataTable = table as DataTable;
                    if (dataTable == null) continue;
                    var dataRows = dataTable.Rows;
                    if (dataRows == null) continue;
                    System.Console.WriteLine("Records found " + dataTable.Rows.Count);
                    foreach (var row in dataRows)
                    {
                        var dataRow = row as DataRow;
                        if (dataRow == null) continue;
                    System.Console.WriteLine(dataRow[0].ToString() + " " + dataRow[1].ToString());
                    }
                }
            }
            catch (Exception ex)
            {
                System.Console.WriteLine(ex.Message);
            }
            finally
            {
               conn.Close();
            }
        }
If your Office version is 32 bit – make sure to install Microsoft Hive ODBC (32). Create a new System DSN entry for your version of Excel (32 or 64) – we will use this to connect to Hadoop. Use the images below to associate the DSN with your connection.
You will be prompted for the rot password. Then a table\field selection dialog will appear for you to choose which fields you wish to import into Excel.
You then have the opportunity to filter the data (just like any other type of ODBC import). Finally the query dialog will process your request and insert the data into Excel as normal.
Imported data from Hadoop in Excel worksheet.
To run the following projects, the Hortonworks VM must be up and running. Below are the four projects I will demostrate:
- Angularjs
- Console
- Data Access Layer (as Entity Framework will not work with an ODBC connection, I have designed a DAL to perform the SQL actions)
- Rest Service
Below are a couple of methods that perform SQL queries against the Hadoop tables. The DAL methods all use the ODBC connection to query the database, and then it’s a simple execution and passing back the results. This DAL is used by the Console application, AngularJS application and the Rest service.
public ActionResults ExecuteSqlStatement(string sqlStatement)
{
using (conn = new OdbcConnection("Dsn=Microsost C# Hadoop;Uid=root;Pwd=finnharps;"))
{
using (var command = new OdbcCommand(sqlStatement, conn))
{
try
{
conn.Open();
using (var reader = command.ExecuteReader())
{
actionResult.ResultTable.Load(reader);
}
}
catch (OdbcException ex)
{
actionResult.ActionStatus = false;
actionResult.ErrorException = ex;
throw;
}
}
}
return actionResult;
}
public ActionResults RetrieveTop10Albumns()
{
using (conn = new OdbcConnection("Dsn=Microsost C# Hadoop;Uid=root;Pwd=finnharps;"))
{
using (var command = new OdbcCommand(@"SELECT * FROM album LIMIT 100;", conn))
{
try
{
conn.Open();
using (var reader = command.ExecuteReader())
{
actionResult.ResultTable.Load(reader);
}
}
catch (OdbcException ex)
{
actionResult.ActionStatus = false;
actionResult.ErrorException = ex;
throw;
}
}
}
return actionResult;
}
The Console application, references the DAL assembly to perform it's SQL requests. The DAL code is explained in the next section.
static void Main(string[] args)
{
try
{
dal = new HadoopDataAccessLayer();
result = new ActionResults();
result = dal.RetrieveTop10Albumns();
foreach (DataRow row in result.ResultTable.Rows)
{
System.Console.WriteLine("--- Row ---");
foreach (var item in row.ItemArray)
{
System.Console.Write("Item: ");
System.Console.WriteLine(item);
}
}
result = dal.RetrieveTop10ArtistAndAlbum();
foreach (DataRow row in result.ResultTable.Rows)
{
System.Console.WriteLine("--- Row ---");
foreach (var item in row.ItemArray)
{
System.Console.Write("Item: ");
System.Console.WriteLine(item);
}
}
result = dal.RetrieveTop10Artists();
foreach (DataRow row in result.ResultTable.Rows)
{
System.Console.WriteLine("--- Row ---");
foreach (var item in row.ItemArray)
{
System.Console.Write("Item: ");
System.Console.WriteLine(item);
}
}
System.Console.WriteLine("Hit <Enter> to close window.")
System.Console.ReadLine();
}
catch (Exception ex)
{
System.Console.WriteLine(ex.Message);
System.Console.ReadLine();
}
}
The Rest service also references the DAL assembly and call the public interface method ExecuteSqlStatement with the SQL statement passed in from the AngularJS client. The resulting class is transformed into JSON and passed back to the calling client.
[HttpGet]
        [Route("api/GenericSql")]
        public HttpResponseMessage Get(string SqlStatement)
        {
            try
            {
                result = dal.ExecuteSqlStatement(SqlStatement);
                JSONresult = JsonConvert.SerializeObject(result);
                var response = Request.CreateResponse(HttpStatusCode.OK);
                response.Content = new StringContent(JSONresult, System.Text.Encoding.UTF8, "application/json");
                return response;
            }
            catch (Exception ex)
            {
                var response = Request.CreateResponse(HttpStatusCode.BadRequest);
                JSONresult = JsonConvert.SerializeObject(ex);
                response.Content = new StringContent(JSONresult, System.Text.Encoding.UTF8, "application/json");
                return response;
            }
        }
Below, is the Rest service deployed in IIS - which inturn is called by AngularJS.
Enter the following URL into your browser to see the JSON results for the Artists table;
<a href="http://localhost/Hadoop/api/Artists">http://localhost/Hadoop/api/Artists</a>
Enter the following URL into your browser to see the JSON results for the Albumtable;
<a href="http://localhost/Hadoop/api/Albums">http:
The following image shows how to execute the Artist controller (GET) method and displays it's JSON results (just like we did with the browser above, only better formatted).
The screen shots below demonstrate the UI of the AngularJS to Hadoop application. The UI will let the user select from a ribbon style menu and display the results in a static grid.
When you click on a ribbon button, the respectie REST service method is called, which inturn calls the respective DAL method and initiates the SQL process with Hadoop (a busybox is rendered to inform the user of the process).
The grid below, shows the resuslts from Hadoop.
AngularJS calling a REST method to filter Hadoop;
The (Ribbonbar) snippet below is standard (SPA) AngularJS syntax, using Controllers, Directives, Routing, Services and Expressions. With (resulting) html pages injected into the main page (MVC).
<div id="testRibbon" class="officebar" ng-controller="ribbonController">
<ul>
<li class="current">
<a href="#" rel="home">Hadoop</a>
<ul>
<li>
<span>Albums</span>
<div class="button" ng-click="buttonClick('Top10Albums');">
<a href="#/Results" rel="table"><img src="Content/ribbon/images/cover32.png" alt="" />Top 10</a>
</div>
</li>
.
.
.
<!--
<div id="content" ui-view="main"></div>
The Controller snippet takes the page events and calls the respective service method, which in turn calls the REST service, which references the DAL and thus can communicate with Hadoop.
$scope.buttonClick = function (value) {
$log.debug('Enter buttonClick');
blockUI.start();
if (value == 'GenericSQL') {
$scope.$parent.ResultTitle = 'Generic SQL'
if ($scope.genericSQL == '') {
alert('Please enter a Hadoop SQL statement!');
return;
}
ribbonService.getGenericSQL($scope.genericSQL)
.then(function (results) {
$scope.$parent.Data = results.data.ResultTable
},
function (results) {
blockUI.stop();
alert("Failed Hadoop data request" + results);
});
}
else if (value == 'FilteredArtist') {
$scope.$parent.ResultTitle = 'Filtered Artists'
if ($scope.filterArtist == '') {
alert('Please enter an artist to filer by!');
return;
}
ribbonService.getFilteredArtist($scope.filterArtist)
.then(function (results) {
$scope.$parent.Data = results.data.ResultTable
},
function (results) {
blockUI.stop();
alert("Failed Hadoop data request" + results);
});
}
Below are two Service methods - notice the URL to our deployed Hadoop REST service - thus it is then simple to communicate with Hadoop.
this.getGenericSQL = function (sqlStatement) {
        return $http({
            method: 'GET',
            withCredentials: true,
            data: 'json',
            url: 'http://localhost/Hadoop/api/GenericSql?sqlStatement=' + sqlStatement
        });
      };

      this.getFilteredArtist = function (filteredArtist) {
          return $http({
              method: 'GET',
              withCredentials: true,
              data: 'json',
              url: 'http://localhost/Hadoop/api/Artists/FilteredArtistAlbum?filter=' + filteredArtist
          });
      };
Once we know how to create an ODBC DSN, we can use basically Microsoft product to communicate with Hadoop, the screenshotsbelow demonstrate how to setup SSIS to export (source) data from Hadoop and export (destination) to an Excel worksheet. The following is a Visual Studio SSIS project.
Adding a Data Conversion to convert the mismatched data types (developers who import from Oracle to SQL Server will take this conversion step as a normal process)
The Excel (destination) worksheet once the SSIS package has been executed.
We can also use Visual Studio to query Hadoop, without having to link in the Hadoop server into SQL Server. by, adding a new connection and using the ODBC DSN as normal.
Perform the SQL queries like it was any other RDBMS system.
To get the connection string – select the properties of the Hive Server.

