Introduction
This is a very small and simple application yet very important as it makes your installer look more professional. This article shows how to add shortcuts of your .NET application to the User's Desktop, User's Programs Menu, and the Quick Launch Bar, based on the user's choice, during installation.
.NET setup projects allow a developer to create shortcuts and place them in the required folder, but the same freedom is not available to the end user who uses your set up to install the application, i.e., the user doesn't have the choice whether to have shortcuts or not. This application gives the user the freedom by which he can select which shortcuts he should add.
There are two important things you should know. First, the file extension of shortcut files (.lnk), and the methods to access system's Special Folders. Our logic is very simple, we are just moving shortcut files from the Application folder to the respective Special Folders.
.NET provides us with classes and methods by which we can find the Special Folders (Desktop, My Documents, Start Up etc.) at runtime. System.Environment.GetFolderPath() helps us to access the path of Special Folders at runtime. It takes as parameter Environment.SpecialFolder.
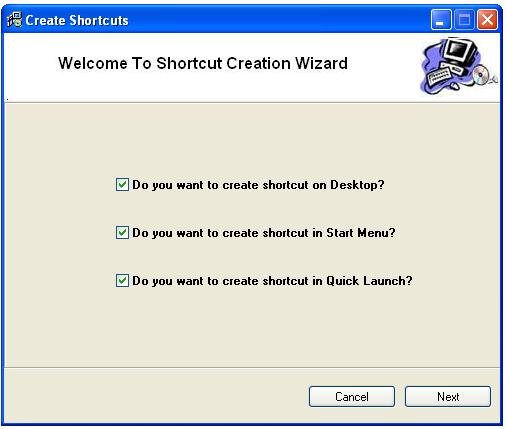
Using the Demo Application
The demo application is provided with the required tool tips which will help you to use the application.
Using the Source Code
In the code given below, first the shortcut on the Desktop is created, then in the Programs Menu, and then in the Quick Launch bar. We are using System.Environment.GetFolderPath() here. It takes the Special Folder as its parameter. It helps us to know the System folders on the client machine during runtime.
if(cbDesktop.Checked==true)
{
File.Move(Application.StartupPath+
"\\Shortcut to Test.lnk",
Environment.GetFolderPath(
Environment.SpecialFolder.Desktop).Trim()+
"\\Shortcut to Test.lnk");
}
if(cbStartMenu.Checked==true)
{
File.Move(Application.StartupPath+"\\Test1.lnk",
Environment.GetFolderPath(
Environment.SpecialFolder.Programs).Trim()+
"\\Test.lnk");
}
if(cbQuickLaunch.Checked==true)
{
File.Move(Application.StartupPath+
"\\Test2.lnk",Environment.GetFolderPath(
Environment.SpecialFolder.ApplicationData)+
"\\Microsoft\\Internet Explorer\\" +
"Quick Launch\\Test.lnk");
}
How to Use This Application in Setup Projects
- Add the project output to the file system editor, as shown in the figure below:

- Select "Primary Output" from the dialog box:

- The added .exe file will look like this:

- Right click on the primary output file. And click the Create Shortcut menu:

- The shortcut file will be created. You can rename this file and use these file names in your actual application, replacing the names of the files in the sample application.

- In the Solution Explorer, right click on your setup project and select View --> Custom Actions.

- The Custom Actions window will open:

- Now, right click on the Install option and click "Add Custom Action":

- In the dialog box that will open, double click on Application Folder:

- In the dialog box that will open, click on the "Add File" button:

- In the dialog box that will open, navigate to the Shortcut.exe file in the Release folder of your application. Only select the .exe file, other dependencies will be added automatically.

- The Custom Actions Editor will look like this:

- Select just the added Shortcut.exe, and press F4 or open the Properties window. Set the
InstallerClass property to False as shown in the figure below. By default, the InstallerClass property is true.

