Introduction
This article describes how to write an application that lets you change the size of the thumbnails in Windows. These are the thumbnails you'll see when you click View -> Thumbnails in Windows Explorer. It also covers some simple registry operations and image handling.
Background
My wife works as a photographer, and she one day asked me if it's possible to make the thumbnails in Windows larger. I didn't know, but thought it would be weird if Microsoft hadn't made this feature. After a quick search, I found a tip by Diana Higgins at Lockergnome, on how to do it. And it worked as intended, so I started making this GUI front-end right away.
A screenshot of the registry key ThumbnailSize that we will focus on:

How it works
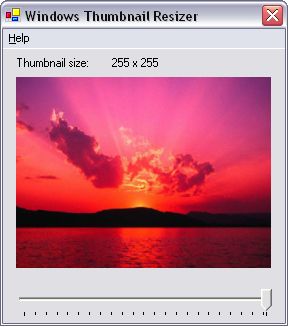
Before we go into the details, I'll give a quick overview of what we need to do to make this work. First, we need a GUI to show how big the thumbnails are going to be. So, this part uses a simple Windows form with a slidebar on it. The image on the form is resized as the user drags the slidebar. The next part we need is functions to read the registry setting, and one to write it. So let's start...
Using the code
The code is heavily commented to make it easy for anyone to follow. It doesn't use any programmatically complicated functions. If there's anything in the code that can be a challenge to follow for a beginner - it has to be the registry handling functions. Therefore, these are explained in detail here. I will also recommend to download the source now and follow it through this article.
First things first. Since this application is a GUI front-end to the registry, we need functions to read and write to, you guessed it, the registry. I'll explain and show the code of the saveRegSettings() here. This functions takes a keyName and a keyValue as arguments, string an int respectively.
We then use a try clause to make everything a bit more failsafe. Inside the try, we set the RegistryKey key to the key \HKEY_CURRENT_USER\Software\Microsoft\Windows\CurrentVersion\Explorer, and use the Registry.CurrentUser.CreateSubKey() to make a key called keyName which, at the time, can only be "ThumbnailSize". We then use RegistryKey.SetValue to give the key the value we want - keyValue. Now, everything is done, and we can close the key with RegistryKey.Close();.
This is a vital code-part of the application. The saveRegSettings is used to write to the Windows Registry:
public void saveRegSettings(string keyName, int keyValue)
{
RegistryKey key = null;
string subKey = "Software\\Microsoft\\Windows\\CurrentVersion\\Explorer";
try
{
key = Registry.CurrentUser.CreateSubKey(subKey);
key.SetValue(keyName, keyValue);
key.Close();
}
catch(Exception ex)
{
Console.WriteLine("Edit: HKEY_CURRENT_USER\\" +
subKey + "\\" + key + "\n" +
"ERROR: " + ex.ToString());
}
finally
{
key.Close();
}
}
Since this application has some easy-to-understand image handling, I'll go through some of that too here, just to point it out. The code below loads the image from a file and displays it in the form. The way this is done is by using the Image.FromFile() function from System.Drawing. This takes a string with the image path as the argument. The resulting image is saved in an Image variable called img.
The next part makes a thumbnail of the now loaded image, and overwrites the old full-size image in the img variable. The tbThumbSize.Value is the value of the scrollbar, and represents the size of the thumbnail the user chooses. The makeThumbnail() takes three arguments, Image, maxWidth, and maxHeight. You'll see from the code that both are set to the same value. This way, we can use both portrait and landscape pictures, because the aspect ratio will be respected when making the thumbnail.
The last things we do are set the label equal to the scrollbar value, and then clean up. That's it!
img = Image.FromFile(Application.StartupPath + "\\Sunset.jpg");
img = ph.makeThumbnail(img, tbThumbSize.Value, tbThumbSize.Value);
lblThumbSize.Text = tbThumbSize.Value + " x " + tbThumbSize.Value;
picThumb.Image = img;
ph = null;
picThumb.Refresh();
Conclusions
This shows you how to make an application to change the Windows thumbnail size. However, it's very easy to adapt these techniques to change anything else in the Windows registry. For example, you can make an application that reads and lets the user change the applications that Windows loads on startup.
If you haven't done it already, now is a good time to download the source code and start experimenting with it.
History
- 28th of April 2006 - Initial release.
