Introduction
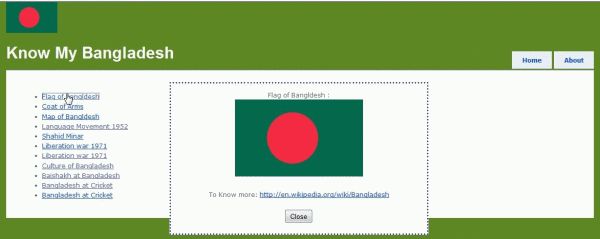
A popup window is a very common thing in Windows programming. If a message is to be given from a program, we just do a MessageBox.Show("Hello!! Its working!"). But in web?? That is not that easy!! I always curse myself while web programming asking why there is no MessageBox.Show() or any dialog pop up. You may have an idea like javascript:window.alert(). But I'm sure that it will never satisfy you.
But a decent solution is possible with the help of CSS and jQuery. The following sections describe a way to make a pop up window appear in a web application.
Background
As this program shows a way using CSS and jQuery, it will be helpful if you get a clear idea of CSS and jQuery. We will also be using ASP.NET MVC. For getting the whole picture, the following links are recommended:
Using the Code
The main idea is, in the body of the HTML code, there would be a <div> which will be initially empty but will work like a container. Whenever I want to make something pop up, I'll put my HTML code into that container and show it to the user.
The following diagram shows every step of the process; the steps are described in the following sections.

Initialization
At first, we put the <div> tag in our HTML file and give it a name, like PopupDiv here. Associate a CSS class with it:
.Popup
{
    position: fixed;
    display: none;
    top: 20%;
    left:30%;
}
In the above CSS code, we put the popup container as a fixed position relative to the browsing window as given by the top and left attribute.
Step 1: RequestPopUp
Now in our main HTML file, we put a button for which a JavaScript function would be called.
function showPopup(id) {
$.get('<%= Url.Content("~/PopUp/GetPopUp") %>', { id: id }, setData);
}
function setData(data) {
...
}
In this JavaScript function, the GET method of the PopUpController.GetPopUp() action method is called. The action method is in the backend using C# code. The action method executes its own logic and communicates with the model and then returns the partial view to the JavaScript. In the JavaScript GET method, we have a setData function which captures the data and does its own logic for the popup, described later.
Steps 2, 3: Get Popup Data
Now the context resides with the controller named PopUpController in its GetPopUp() action.
public ActionResult GetPopUp(int id)
{
...
...
return View("UserControl/PopupView");
}
In the controller action, the controller communicates with the model. In this case, the BDInfoRepository class object returns its necessary information. The controller populates the partial view (user control) PopupView.ascx with the ViewData dictionary object. Then it automatically calls the JavaScript setData function with the data parameter assigned as View HTML.
Steps 4, 5: Fill the popup container and show to the user
Ladies and gentlemen, we are eagerly waiting for the jQuery code in action. Here it is, as Dr. Robert Langdon starts his investigation!! Previously, the controller did its job and sent the data to the JavaScript. Now setData holds the ancient symbol secret:
function setData(data) {
$("#PopupDiv").html(data);
$("#PopupDiv").css("display","block");
}
At first, the $("#PopupDiv").html(data); statement fills our beloved pop container with the HTML data given by the model. But wait! It's still not visible. Because we didn't made it visible as display:none; is assigned. So let's assassinate the attribute by using the jQuery statement $("#PopupDiv").css("display","block"); as it modifies the CSS as display:block;.
Now as our popup containing div is shown as a block, it will block other controls and will be visible as a popup window.
Final touch
We have got what we wanted!! Let's go find another adventure!! But wait. We are stuck in the stupid popup window. We need a exit the pop up. We should make the popup view look like below:
// Customized Html
< button onclick="CloseWindow()">Close
function CloseWindow() {
    $("#PopupDiv").css("display", "none");
}
Here we get an exit when clicking on the close button and we restore the popup window to its previous state. So the mystery is solved. We live another day to find another adventure!
History
- Version 1: 25 April, 2011.
