Introduction
As we know, an input file element allows you to select only one file at a time, i.e., you can upload only one file at a time using an input file element. If you want to upload multiple files at a time, then you have to add as many file input elements as the number of files you want to upload. The reason behind this is you can only store the file upload information in an input file element. You can not set the value directly for an input file element programmatically, due to security reasons.
Now, I am going to present here an ASP.NET User Control that can be used to upload multiple files at once. I have named it ‘Multiple File Upload User Control’. This doesn’t mean that this user control can upload multiple files using a single file input element. Actually, in this control, an input file element gets hidden after selecting a file, and a new file input element is added in its place. Now, since this phenomenon happens so quickly, it'd seem that there is only one file input element. Hiding a selected file input element and creating a new file input element is done using JavaScript.
Appearance of the User Control
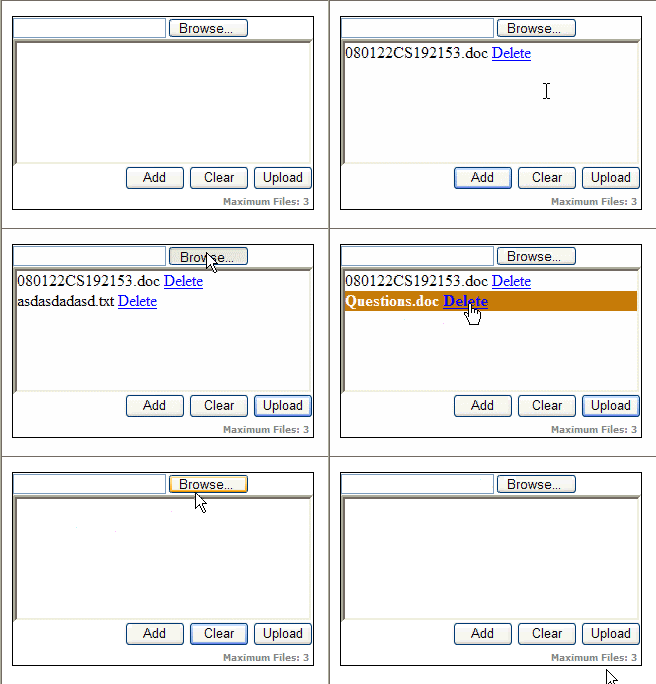
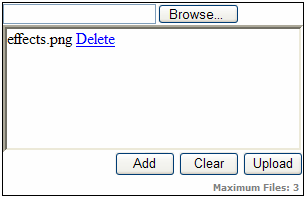
This user control consists of an input file element, a ListBox and three Buttons. A brief description of each is given below:

- Input file element: Used to select a file.
- ListBox: Used to display the selected files.
- Add button: Used to add a selected file into the
ListBox. - Clear button: Used to remove all selected files from the ListBox.
- Upload button: Used to upload all the selected files to the server.
- Delete link: This appears at the right hand side of the each selected file. By clicking on it, you can remove it from selected files list.
Properties of the User Control
This User Control has two public properties.
Rows: Used to set/get the number of visible rows to display. The default value for this is 6.UpperLimit: Used to set/get the maximum number of files to upload.
Events of the User Control
This User Control has only one server-side event.
Click: Fires when the upload button is clicked. The delegate that represents the Click event signature for the MultipleFileUpload control is given below:
public delegate void MultipleFileUploadClick(object sender, FileCollectionEventArgs e)
I will discuss about it later. The second argument is a FileCollectionEventArgs class that gives useful information about the posted files. This class has following readonly public properties:
PostedFiles: Gives the HttpFileCollection of all posted files.Count: Gives the total number of posted files.HasFiles: Gets the value indicating whether this user control contains any posted file or not.TotalSize: Gives the total size in KB of all posted files.
Using the User Control
Drag and drop the user control into an ASPX page and set values for the Rows and UpperLimit properties. The HTML code for this user control looks like:
<uc1:MultipleFileUpload ID="MultipleFileUpload1" runat="server" UpperLimit="4" Rows="6" />
Next, create an event handler for the Click event for this user control:
protected void MultipleFileUpload1_Click(object sender, FileCollectionEventArgs e)
{
   ...
}
Now, wire up the event handler in the control tag by adding the prefix On in front of the event name. Now, the HTML code will look like:
<uc1:MultipleFileUpload ID="MultipleFileUpload1" OnClick="MultipleFileUpload1_Click"
                        runat="server" UpperLimit="4" Rows="6" />
Uploading the Posted Files using the User Control
Finally, select the necessary files and click on the Upload button of the user control to upload the posted files. The code for uploading the posted files is given below:
protected void MultipleFileUpload1_Click(object sender, FileCollectionEventArgs e)
{
   HttpFileCollection oHttpFileCollection = e.PostedFiles;
   HttpPostedFile oHttpPostedFile = null;
   if (e.HasFiles)
   {
      for (int n = 0; n < e.Count; n++)
      {
         oHttpPostedFile = oHttpFileCollection[n];
         if (oHttpPostedFile.ContentLength <= 0)
            continue;
         else
            oHttpPostedFile.SaveAs(Server.MapPath("Files") + "\\" +
               System.IO.Path.GetFileName(oHttpPostedFile.FileName));
      }
   }
}
The above code is straightforward and self-explanatory.
User Control HTML
The HTML of this user control is very simple.
<asp:Panel ID="pnlParent" runat="server" Width="300px"
           BorderColor="Black" BorderWidth="1px" BorderStyle="Solid">
   <asp:Panel ID="pnlFiles" runat="server" Width="300px" HorizontalAlign="Left">
      <asp:FileUpload ID="IpFile" runat="server" />
   </asp:Panel>
   <asp:Panel ID="pnlListBox" runat="server" Width="292px" BorderStyle="Inset">
   </asp:Panel>
   <asp:Panel ID="pnlButton" runat="server" Width="300px" HorizontalAlign="Right">
      <input id="btnAdd" onclick="javascript:Add();"
             style="width: 60px" type="button" runat="server" value="Add"/>
      <input id="btnClear" onclick="javascript:Clear();"
             style="width: 60px" type="button" value="Clear" runat="server"/>
      <asp:Button ID="btnUpload" OnClientClick="javascript:return DisableTop();"
           runat="server" Text="Upload" Width="60px" OnClick="btnUpload_Click"/>
      <br />
      <asp:Label ID="lblCaption" runat="server" Font-Bold="True"
           Font-Names="Verdana" Font-Size="XX-Small" ForeColor="Gray">
      </asp:Label>
   </asp:Panel>
</asp:Panel>
There are three Panels in this user control. The file panel [ID="pnlFiles"] is for the input file elements, the ListBox panel [ID="pnlListBox"] is for listing the selected files and the Button panel [ID="pnlButton"] has three buttons: two for the client side events and one for the server side. Both the Add button [id="btnAdd"] and the Clear button [id="btnClear"] have client-side onclick events. The server side button [ID="btnUpload"] has a client side OnClientClick event as well as a server side OnClick event. The Label [ID="lblCaption"] is used here to display the upper limit for this user control.
I have used the FileUpload control [ID="IpFile"] of ASP.NET 2.0 in the File panel instead of using an input file element. The reason behind this is it automatically adds enctype="multipart/form-data" to the page's <form> element.
User Control Code
The user control class has following definition for its Click event.:
public event MultipleFileUploadClick Click;
The delegate that represents the Click event signature is given below:
public delegate void MultipleFileUploadClick(object sender, FileCollectionEventArgs e);
FileCollectionEventArgs is an event argument class that contains the basic information about the posted files. I will discuss it later. The Click event for this user control is fired in the click event of the Upload button.
protected void btnUpload_Click(object sender, EventArgs e)
{
Click(this, new FileCollectionEventArgs(this.Request));
}
The user control class has a private method GetJavaScript(). This method generates the necessary client side JavaScript for this user control. This is registered in Page_Load event of the user control using the RegisterStartupScript method.
Now, let's discuss the FileCollectionEventArgs class that represents the second argument of the Click event.
public class FileCollectionEventArgs : EventArgs
{
    private HttpRequest _HttpRequest;
    public HttpFileCollection PostedFiles
    {
        get
        {
            return _HttpRequest.Files;
        }
    }
    public int Count
    {
        get { return _HttpRequest.Files.Count; }
    }
    public bool HasFiles
    {
        get { return _HttpRequest.Files.Count > 0 ? true : false; }
    }
    public double TotalSize
    {
        get
        {
            double Size = 0D;
            for (int n = 0; n < _HttpRequest.Files.Count; ++n)
            {
                if (_HttpRequest.Files[n].ContentLength < 0)
                    continue;
                else
                    Size += _HttpRequest.Files[n].ContentLength;
            }
            return Math.Round(Size / 1024D, 2);
        }
    }
    public FileCollectionEventArgs(HttpRequest oHttpRequest)
    {
        _HttpRequest = oHttpRequest;
    }
}
The FileCollectionEventArgs class is derived form the EventArgs base class. The constructor for the FileCollectionEventArgs class takes an HttpRequest object as an argument. The FileCollectionEventArgs class has four public properties as discussed earlier. The files property of the HttpRequest class has all the posted files as a HttpFileCollection class. The rest of the properties are easy to understand.
Limitations
The maximum size that can be uploaded to the server using this user control is around 4MB, i.e., the sum of sizes of all the files to be uploaded should be less than 4MB. You can not upload anything that is larger than 4MB. If you want to upload more than 4MB, then you have to make some changes in the web.config file; e.g., if you want to upload around 10MB, then make the following change in the <httpRuntime> node of the system.web section of the web.config file.
<httpRuntime maxRequestLength="102400" executionTimeout="275"/>
You can find more information regarding this on the MSDN website [^].
Conclusion
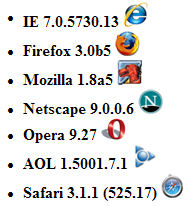
I have tried my best to make this user control code error free. I will most welcome suggestions for further improvement in this user control. I have tested this user control on various browsers and it works fine. The list of browsers along with versions is given below:

