Introduction
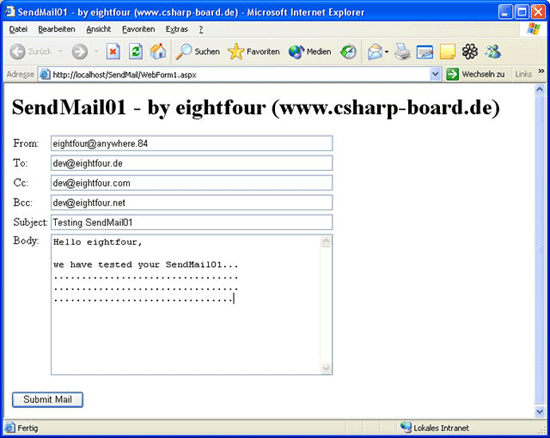
In this article I will show you how easy it is to create your own mailer. This sample is for beginners and provides just one To:, Cc: and Bcc: - there is also no parser for the From: - TextBox, so you don't have to use white spaces for the From-Name.
Using the code
The code is very small and easy to read, so I don't have many things to explain. At first I have created some TextBoxes using Drag & Drop (VisualStudio). Then I double-clicked on the submit-button and Visual Studio created an event
for it. All the important source is inside the click-event.
1. Create an instance of SmtpMail.
2. Set the properties with text from the TextBoxes.
3. Try to send the mail and write info to the screen.
protected void ButtonSubmit_Click(object sender, System.EventArgs e)
{
    Server.ScriptTimeout = 1000;
    Response.Flush();

    SmtpMail.SmtpServer = "localhost";
    MailMessage mail = new MailMessage();
    mail.To = this.TextBoxTo.Text;
    mail.Cc = this.TextBoxCc.Text;
    mail.Bcc = this.TextBoxBcc.Text;
    mail.From = this.TextBoxFrom.Text;
    mail.Subject = this.TextBoxSubject.Text;
    mail.Body = this.TextBoxBody.Text;

    try
    {
        SmtpMail.Send(mail);
        Response.Write("The Mail has been sent to: ");
        Response.Write(mail.To);
        Response.Write(mail.Cc);
        Response.Write(mail.Bcc);
    }
    catch(System.Exception ex)
    {
        Response.Write(ex.Message);
    }

    Response.Flush();
}
Points of Interest
For the Demo I have created an Installer (msi-file). So you just extract the
file and start the installer. The virtual directory etc. creates the installer
for you - also a shortcut on your desktop, so you just doubleclick it and see
the demo. But if it doesn't work (an error occurs) you have to change the options for
your smtp-server. Normally the server is running but doesn't accept any mails
from any computer - you have to change this setting.
Here how you can do it (sorry but I have a german Windows, so the text is maybe different from yours):
First open your IIS and click with the right mouse-button on your SMTP-server:

Then select "Eigenschaften" or "Properties" (I think it's called in English):
A new Window opens. Here go to the second tab and click on the last button:
And here is one more window. You have the choice between adding a special computer (ip, name) which is allowed to send mails, and to give this permission to all computers (second option):
That's it - now the Demo has to work!


 General
  News
News  Suggestion
  Question
  Bug
Bug  Answer
  Joke
Joke  Praise
  Rant
Rant  Admin
Admin 


 System.Web.HttpException: Could not access 'CDO.Message' object. ---> System.Reflection.TargetInvocationException: Exception has been thrown by the target of an invocation. ---> System.Runtime.InteropServices.COMException (0x80040213): The transport failed to connect to the server. --- End of inner exception stack trace --- at System.RuntimeType.InvokeDispMethod(String name, BindingFlags invokeAttr, Object target, Object[] args, Boolean[] byrefModifiers, Int32 culture, String[] namedParameters) at System.RuntimeType.InvokeMember(String name, BindingFlags invokeAttr, Binder binder, Object target, Object[] args, ParameterModifier[] modifiers, CultureInfo culture, String[] namedParameters) at System.Web.Mail.LateBoundAccessHelper.CallMethod(Object obj, String methodName, Object[] args) --- End of inner exception stack trace --- at System.Web.Mail.LateBoundAccessHelper.CallMethod(Object obj, String methodName, Object[] args) at System.Web.Mail.CdoSysHelper.Send(MailMessage message) at System.Web.Mail.SmtpMail.Send(MailMessage message) at EVC.WebForm2.Button1_Click(Object sender, EventArgs e) in c:\evc\webform2.aspx.cs:line 76
 Pwhy no person reply me?