Introduction
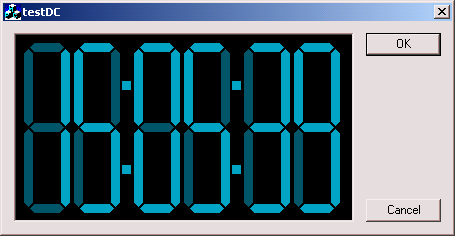
The main idea of this project is creation of a digital segment indicator. In the first version I had developed one segment indicator. After this I grouped some segment indicators and colon indicator and made the DigitalClock class. The next step was creation of an Active X control, based on DigitalClock class.
The base class is CDigit. This class draws segments of a digit with given brush, pen and width. The common function of this class is drawDigit(HDC dc, const int iDigit). This function gives the device context for painting and the number.
void CDigit::drawDigit( HDC dc, const int iDigit )
{
switch( iDigit )
{
case 0:
drawSegment(dc, UET, true );
drawSegment( dc, RUET, true );
drawSegment( dc, RDET, true );
drawSegment( dc, DET, true );
drawSegment( dc, LDET, true );
drawSegment( dc, LUET, true );
drawSegment( dc, MET, false );
break;
case 1:
drawSegment( dc, UET, false ); drawSegment( dc, RUET, true );
drawSegment( dc, RDET, true ); drawSegment( dc, DET, false );
drawSegment( dc, LDET, false ); drawSegment( dc, LUET, false );
drawSegment( dc, MET, false );
break;
.........In same manner draw segments for other digits...............
The digit enumeration:
enum DEType
{
UET = 0,
RUET = 1,
RDET = 2,
DET = 3,
LDET = 4,
LUET = 5,
MET = 6
};
The function drawSegment is used for painting of one segment:
void CDigit::drawSegment( HDC dc, const DEType segType,
const bool bState ) const
{
HBRUSH oldBrush = (HBRUSH) SelectObject( dc,
(bState) ? m_activeBrush : m_inactiveBrush );
HPEN oldPen = (HPEN) SelectObject( dc, (bState) ? m_hActPen : m_hInactPen );
Polygon( dc, m_ptDG[ segType ], 6 );
SelectObject( dc, oldPen );
SelectObject( dc, oldBrush );
}
drawSegment selects the correspond brush and pen and calls Poligon API function, which draws a segment.
In this project, I had some difficulties with persisting of control's properties. After some experiments I did following:
void CDigitalClockCtrl::DoPropExchange(CPropExchange* pPX)
{
ExchangeVersion(pPX, MAKELONG(_wVerMinor, _wVerMajor));
COleControl::DoPropExchange(pPX);
long lSOffset = GetLSOffset();
long lSWidth = GetLSWidth();
long lXOffset = GetLXOffset();
long lYOffset = GetLYOffset();
OLE_COLOR clrActive = GetClrActive();
OLE_COLOR clrBkgnd = GetClrBkgnd();
OLE_COLOR clrInactive = GetClrInactive();
PX_Long( pPX, _T("lSOffset"), lSOffset );
PX_Long( pPX, _T("lSWidth"), lSWidth );
PX_Long( pPX, _T("lXOffset"), lXOffset );
PX_Long( pPX, _T("lYOffset"), lYOffset );
PX_Color( pPX, _T("clrActive"), clrActive );
PX_Color( pPX, _T("clrBkgnd"), clrBkgnd );
PX_Color( pPX, _T("clrInactive"), clrInactive );
SetLSOffset( lSOffset );
SetLSWidth( lSWidth );
SetLXOffset( lXOffset );
SetLYOffset( lYOffset );
SetClrActive( clrActive );
SetClrBkgnd( clrBkgnd );
SetClrInactive( clrInactive );
}
First I get control's properties by invoking control's Getxxx functions, after that call macros and call Setxxx functions to set new properties' values.
Using the component
- Register component by using: regsvr32 <path\to installed\axtivex>
- Add component to projects
- The component icon will appear on controls toolbar
- Using drag-and-drop operation, put the component into dialogs.
- Set appropriate settings


 General
  News
News  Suggestion
  Question
  Bug
Bug  Answer
  Joke
Joke  Praise
  Rant
Rant  Admin
Admin 


