Introduction
One day my Product Manager asked me to add version information display to our program suite. He asked me how long it would take, and since I knew the trick for displaying the Windows properties dialog, I told him it would take two days. Big mistake! I forgot that he almost never likes first thing I show him. So, next day, I showed him this:
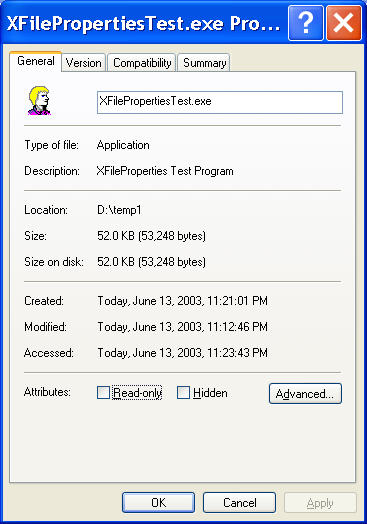
And naturally he did not like it. He was concerned that users may click on Advanced button and change something, which would cause us support problems. OK, that is not unreasonable. So I toldl him that we would need to reverse engineer functionality and create a dialog without user interaction buttons. He asked me how long it would take, and since I knew there were classes available to get version information, I told him it would take four days. Big mistake! I find out that classes available are good if you know version strings in advance (like Product Name, etc.), but not so good if you need to populate two listboxes like in properties dialog. Since some of our apps are actually provided by third-party vendors, we have no control over what version string names they use. I also discovered that at least one vendor has an exe with a custom-generated version resource which seemed to defy all classes I tested it with.
OK, now is time to get serious. After looking through hex dumps of version data, I figured out the structure and how to populate controls, and make dialog look pretty close to Windows properties dialog. Here is test app, which allows you to compare Windows dialog and XFileProperties dialog (both are modeless, and will allow multiple copies of dialog, as long as selected file is different):

Clicking on Windows Properties button will display dialog you see above. Clicking on XFileProperties button will display this dialog:
The version tab:
How to use
To integrate CXFileProperties into your app, you first need to add following files to your project:
- Version.cpp
- Version.h
- XFileProperties.cpp
- XFileProperties.h
- XFileProperties.rc
- XFilePropertiesRes.h
- XSplitpath.h
Next, include XFileProperties.h in appropriate project files, and include XFileProperties.rc and XFilePropertiesRes.h in your project's rc file. You can do this by going to View | Resource Includes and entering the files as shown below:
Now you are ready to start using CXFileProperties. Here is code that invokes CXFileProperties in demo app:
void CFilePropertiesTestDlg::OnXfileprops()
{
    CString str;
    m_FileName.GetWindowText(str);

    CXFileProperties *pDlg = new CXFileProperties(str, this);

    if (!pDlg)
    {
        ASSERT(FALSE);
    }
}
Acknowledgments
Revision History
Version 1.0 - 2003 June 14
Usage
This software is released into the public domain. You are free to use it in any way you like. If you modify it or extend it, please to consider posting new code here for everyone to share. This software is provided "as is" with no expressed or implied warranty. I accept no liability for any damage or loss of business that this software may cause.


 General
  News
News  Suggestion
  Question
  Bug
Bug  Answer
  Joke
Joke  Praise
  Rant
Rant  Admin
Admin 


