Introduction
Several server-side tabstrip controls are available for ASP, PHP, and JSP etc. For example, a 2D tabstrip can be added to any ASPX page by combining the ASP.NET MultiView and Menu controls. However, such pages are posted back to the server every time the user clicks on a tab button. This is unnecessary in some situations, causing delays which can be annoying for the user.
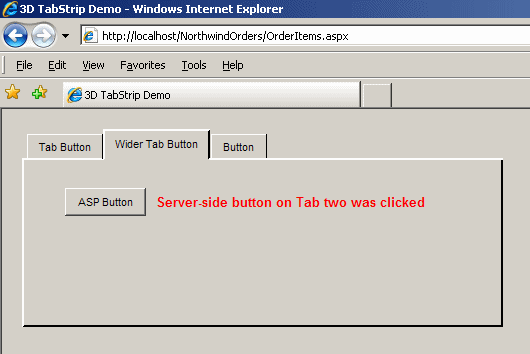
This article describes a client-side Tabstrip which is only posted to the server when necessary. Clicks on the tab buttons are processed in the browser using JavaScript so that the user does not have to wait unnecessarily.
Compatible with any server-side programming language
The Tabstrip was developed using HTML, JavaScript, and CSS only. Consequently, it can be added to any web-application project, regardless of the server-side programming language used. The Tabstrip has several useful features, such as:
- Round trips to the server are only made when the user performs an action that requires post-back.
- It works equally well in both the Internet Explorer and Firefox web-browsers.
- The tab buttons have a 3D look and feel, similar to a "Windows classic" desktop application.
A typical use of the Tabstrip page would be as a web-application "Options…" form, which could be displayed in a pop-up window. E.g., the Tabstrip page looks similar to the "Internet Options" pop-up window which can be accessed via the "Tools" menu in Internet Explorer.
How to add the Tabstrip page to your ASP.NET project
The Tabstrip can be added to a project created within any development environment. However, it has been designed for ease of use within Microsoft Visual Studio 2008 or Visual Web Developer Express 2008 (which is free). The Tabstrip page can be added to your ASP.NET project as follows:
- Click on the download link (see above) to download the Tabstrip code, then unzip this file.
- Add a new .aspx or .html page to your ASP.NET project (give this page a name that suits your project).
- Open the unzipped TabStrip.html file in a text editor such as Notepad - but don't add this file to your project.
- Paste the code in the TabStrip.html file over the top of the
<html>...</html> in your new page - but don't paste over the top line of an .aspx page. - Add the unzipped TabStrip.css and TabStrip.js files to your ASP.NET project.
The resulting page is shown below in the Visual Studio 2008 designer. Controls can be dragged from the Toolbox and dropped onto the tabs, as shown in the screenshot. The tabs can be resized in the designer and the Tabstrip will automatically resize itself to suit when the Tabstrip page appears.

How to add new tabs to the Tabstrip
New tabs can be added by simply copying, pasting, and then editing the HTML that describes an existing tab.
For example, to add tab 3, you could copy and paste the three pieces of HTML that describe tab 2, then change their id attributes like this: id="tabtop3" and id="3" and id="tab3", as shown below. The width of the tab button <td...> also needs to be changed to match the width of the new button's label using style="width: 38px;", as shown.
<td id="tabtop3" class="tabTopFiller"/><td/>
.
.
.
<td id="3" class="tabButton" style="width: 38px;" onclick='showTab(this.id)'>
    Button
</td>
<td class="tabRightFiller"/>
.
.
.
<div id="tab3" class="tabDiv" style="height: 150px; width: 470px;">
    This is Tab three
</div><br/>
